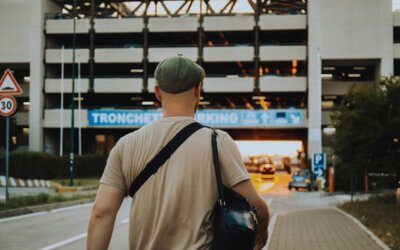
- Parking in Florence – How to avoid fines - 11. August 2025
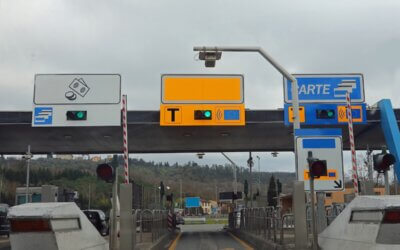
- Telepass Italy: stress-free travel and toll savings - 13. April 2025
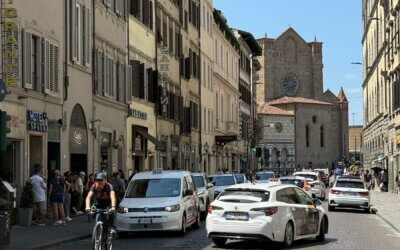
- What do I need to bear in mind when parking in Italy? - 21. January 2025
Alpencross Garmisch Gardasee - My buddies Ralph, Christian and I had been planning this tour for a long time. We are enthusiastic hobby mountain bikers and spend a lot of time in the Palatinate Forest. For us mountain bikers, an Alpine cross like the ascent to the Tremalzo is simply a must.
As we didn't want to go on a pre-planned tour and weren't physically prepared for the Heckmair route, we decided to plan our own tour. Of course, we had our luggage with us for the 6 stages and did not use any luggage transport.
The tour was divided into several stages so that we had a new challenge every day. The route from Garmisch-Partenkirchen to Riva del Garda was to be completed in 6 stages.

Preparations for the MTB Alpencross from Garmisch to Lake Garda
The Alpencross MTB Garmisch Gardasee is a challenging tour that requires good preparation. Here are a few things you should consider in order to be prepared for the tour:
-
- Organization
We thought long and hard about how to organize the journey and the transport of the bikes. The start was in Garmisch, but after the finish in Riva we had to return. There are bike shuttles that you can book, but they were either not available or extremely expensive. What did we do? We drove to Lake Garda in 2 cars and left my car there at our apartment. The next day we took the bikes and Ralph's car to Garmisch. When we arrived in Riva, we drove to Garmisch in my car and picked up Ralph's car.
- Organization
- Training
Our MTB Alpine Cross Garmisch Lake Garda was planned for the end of August / beginning of September. We started training in the spring and covered as many kilometers as possible. The Palatinate Forest is a very good training area. For example, I did a 3-day tour with Käthe and of course also trained at Lake Garda. Ralph, Christian and I also did a 50km tour in the Pfälzer Wald mountain bike park. So we were prepared, we thought...

- Technology
Check that your mountain bike is in order. For example, we fitted new brake pads, changed the tires (Ralph fitted a fat Maxxis Minion DHR II 29x2.40" WT TR EXO ) and replaced the chain. More about the tires later.... 🙂 We also checked the damper settings, checked all screws and tightened them if necessary.
- Spare parts
You should think carefully about which spare parts you take with you. As there were three of us on the road, we were able to split the spare parts and tools up a bit.
-
- Clothing etc
For an alpine cross without luggage transport, you need to plan your clothing etc. accordingly. Find out more in the packing list. - Tour planning Alpencross with Komoot
We planned most of our tour online with Komoot. With its detailed maps and useful functions, Komoot is an indispensable tool for anyone who wants to tackle the Alpencross MTB. We also used classic map material. If the battery fails or other technical problems occur, a paper map is still the first choice. - Accommodation
We have decided to stay in hotels or guesthouses for the entire tour. Everyone had their own room and a good night's sleep. In the mornings we had a hearty breakfast and sometimes dinner at the hotel. We booked the accommodation in advance according to the stages.
- Clothing etc
Alpencross MTB Garmisch Lake Garda - Equipment
Mountain bikes
The most important thing on a 6-day Alpine cross is the equipment. On the one hand, there are the mountain bikes. All 3 of us ride a full-suspension mountain bike without e-drive with 29-inch tires. This is now standard. Ralph rides a Radon Slide 10.0 HD with 160 mm travel at the front and 140 mm travel at the rear. Ralph opted for a double derailleur when buying his bike, which can be an advantage on an Alpine cross due to the finer gradation compared to a single derailleur. Christian rides a Radon Skeen Trail 8.0 with 130 mm travel at the front and 120 mm travel at the rear. I ride a Cube Stereo SL with 120 mm travel front and rear.
We all ride with different saddles, either from SQ-Labs or Ergon. Due to the long tours, this has absolutely proved its worth. I also use Ergon grips, which provide better pressure distribution in the ball of the hand.
We have small bags for small parts and tools that we attach to the saddle. In addition to the cell phones, we also use the Garmin Edge to track the planned tours. Christian and I also bought a small bag for attaching the top tube. If it rains, we can at least store our cell phone with charging cable and a bar there. Christian has made little cards with the most important stops for each stage. We were able to store these well in the foil viewing area of the top tube pockets.

- Backpack
A high-quality backpack is essential for an alpine cross. Some manufacturers offer special backpacks that provide both the necessary comfort and sufficient volume. We use the Deuter Trans Alpine 30.
- Clothing
You should also attach importance to high-quality materials when it comes to cycling clothing. In my opinion, however, it doesn't always have to be the latest high-end product. Here are the most important pieces of equipment I use:
Bicycle helmet: A helmet with a MIPS system makes sense. I have had a Bell 4Forty for some time now and am very happy with it.
Cycling shoes: I used the SH-XM9 MTB shoes from Shimano for the Alpencross. These are quite heavy, but very stable.
Cycling gloves: It's up to you whether you choose the closed or fingerless version. Christian and I ride fingerless, Ralph swears by the closed version.
Cycling glasses: I use cycling glasses from ROSE. It is perfectly adequate for my purposes. It has 3 different disk inserts and is inexpensive.
Cycling jersey: I hate these tight jerseys, I feel like a sausage in them. That's why I've been using T-shirt-style jerseys or long-sleeved jerseys from Fox for some time now. They have a looser cut and I feel comfortable in them. I normally wear a functional undershirt underneath, but here I also like to use the cheap version from Decathlon.
Water bottle or hydration bladder? We have opted for drinking bottles. The rucksack was already well filled anyway, so a water bottle would have been a nuisance. Each of us had 3 water bottles with us, one on the bike and two in the side compartments of the rucksack.
Cycling shorts: It has proven to be a good idea to wear a bib. I have cheap bibs from Decathlon, but also one from Cube. I get on well with both variants. I wear wide downhill pants over them, e.g. from Cube.
Rain pants: I have a pair of ¾ rain pants from Vaude. For me, this is a good compromise between long and short rain pants. There is still some air in the legs and you don't sweat so much. Nevertheless, you are reasonably protected from the wet.
Rain jacket: This was the most difficult part of choosing the right clothing. I searched for a long time until I found a rain jacket that was both breathable and waterproof. My final choice was a rain jacket from Jack Wolfskin. The price-performance ratio was the best for me.
Neoprene overshoes: I hate wet feet. We've been on tours where you could pour the water out of your shoes in the evening. And it takes ages to get them dry again with a hairdryer. That's why I bought neoprene overshoes for rainy weather. They are waterproof and also keep you a little warm.
- Tools and spare parts
It makes sense to take a mini tool, an air pump and possibly a shock pump with you. We also recommend taking at least one spare inner tube, a repair kit, chain oil, a derailleur hanger, a few chain links, a spare derailleur cable and cable ties. As there were three of us, we divided the tools between us.
With this equipment we were ready for the Alpencross MTB Garmisch-Gardasee!
Alpencross MTB Garmisch Gardasee -
Tour planning with Komoot
As already mentioned, we planned our Alpencross mainly online with Komoot. Here we were able to fall back on individual sections of the route that other mountain bikers had already ridden before us. In the Pro version, you can also save the maps offline, which is very useful in the Alps when cell phone reception is poor. You can also choose between different maps, which is very helpful.
Ralph and Christian in particular invested a lot of time in planning the individual stages. We wanted to plan a scenic route with few roads and asphalt, but one that was still manageable for our fitness level. The maximum route length was 60 km and the maximum elevation gain per day was 2000 meters.
This led to the detailed planning, from which the following stages emerged:
Stage 1: Garmisch-Schönberg(Stubai)
Stage 2: Schönberg-Sterzing
Stage 3: Sterzing-Klausen
Stage 4: Klausen-Seiser Alm->Bozen
Stage 5: Bozen-Kalterer See-Spormaggiore
Stage 6: Spormaggiore-Riva del Garda
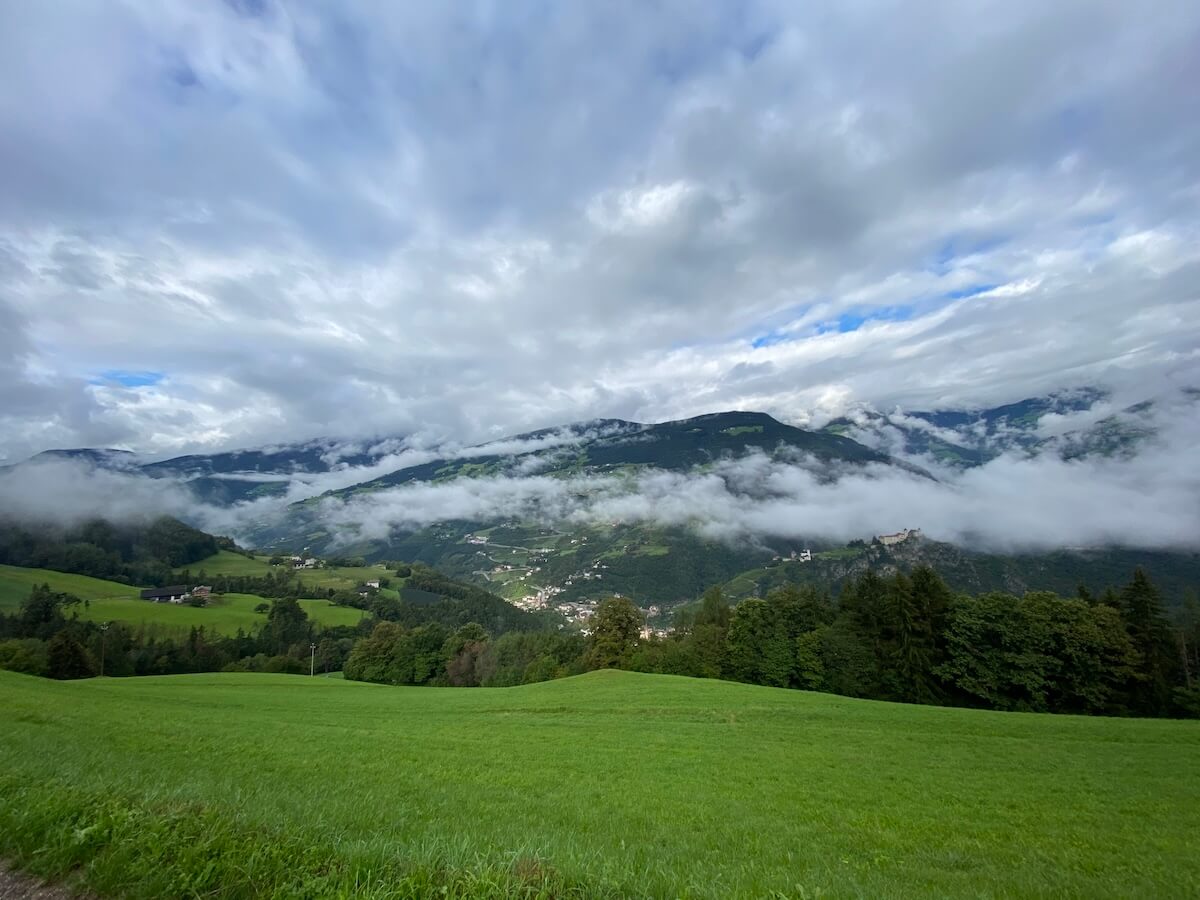
Stage 1: Garmisch Partenkirchen to Schönberg | 60.7 km, 980 m difference in altitude
We spent the night before our first stage at the Hotel Klosterbräu Schlehdorf. Our adventure then began at the sports park in Garmisch-Partenkirchen. Especially in summer, when no events are taking place, you can park there for free.
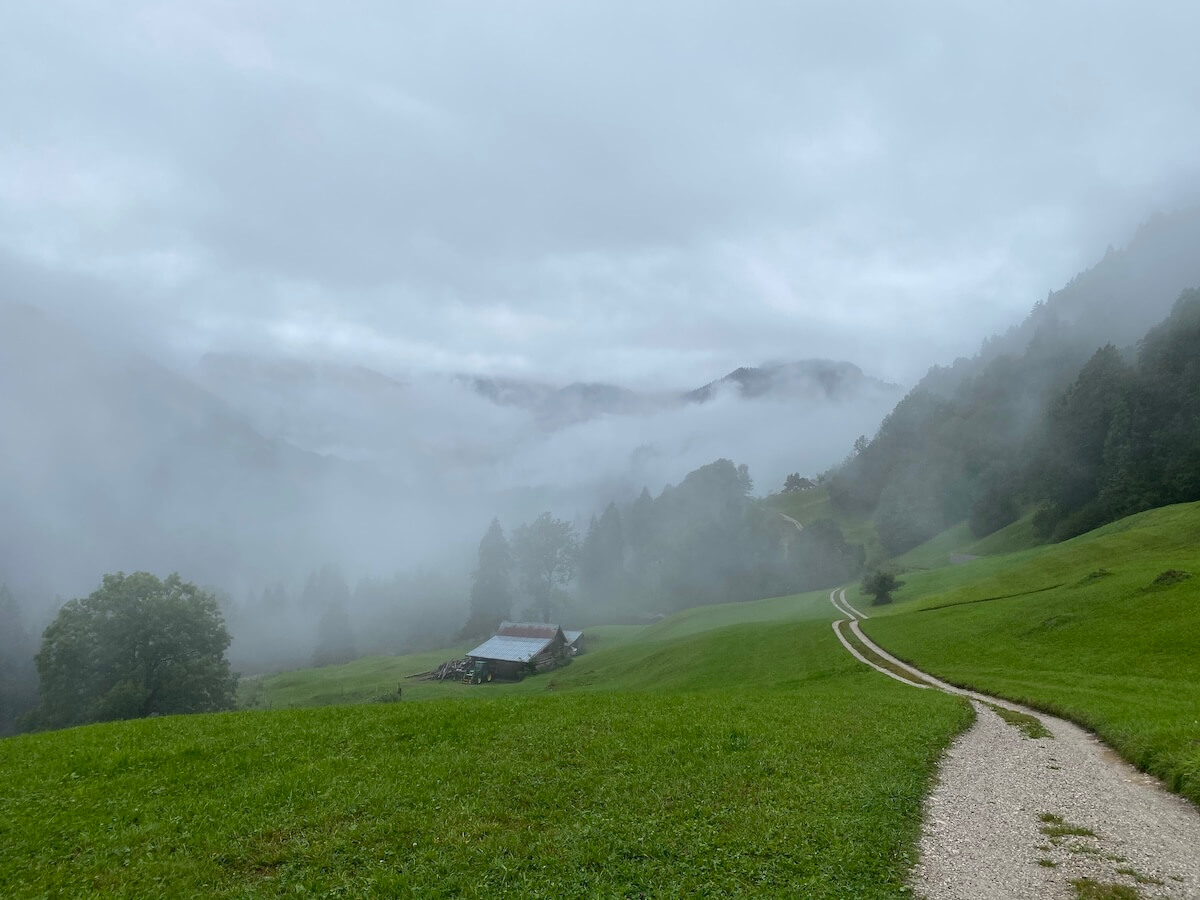
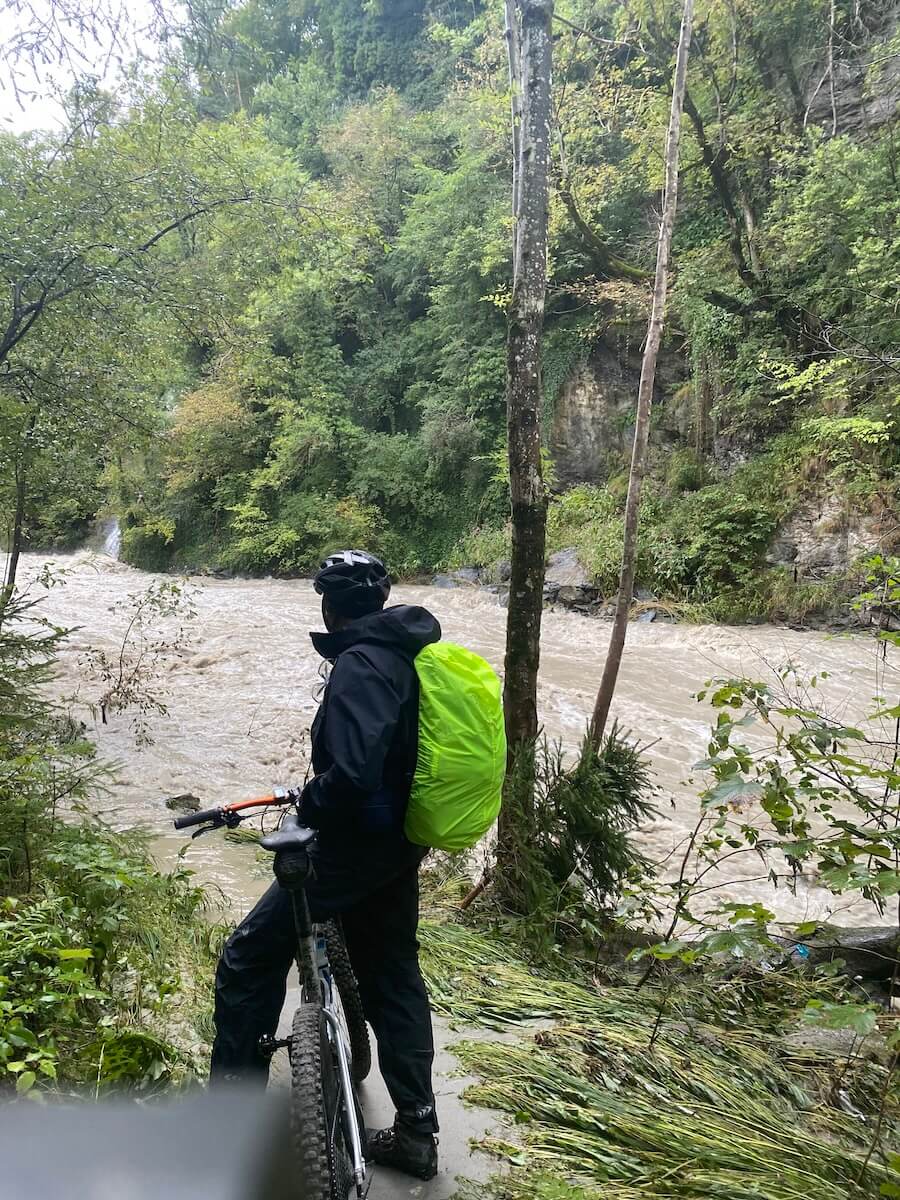
The weather was mixed, with light rain starting at the start. On the ascent to Mittenwald, the rain became heavier and heavier, and the temperatures were quite modest for the end of August at just under 15°C.
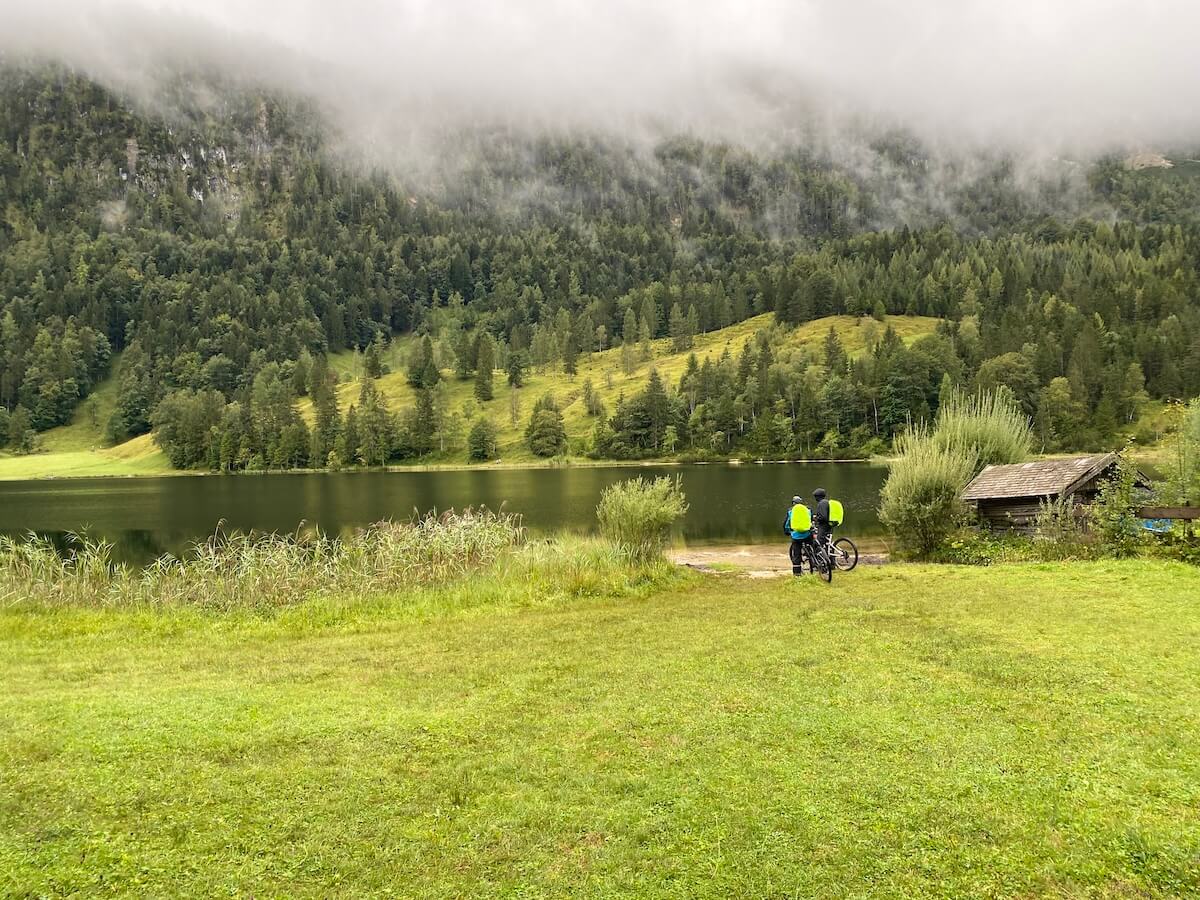
We passed the Ferchensee lake on our way to Innsbruck via Mittenwald, Scharnitz, Seefeld and Zirl. A short break was taken in Seefeld to replenish the calorie stores.
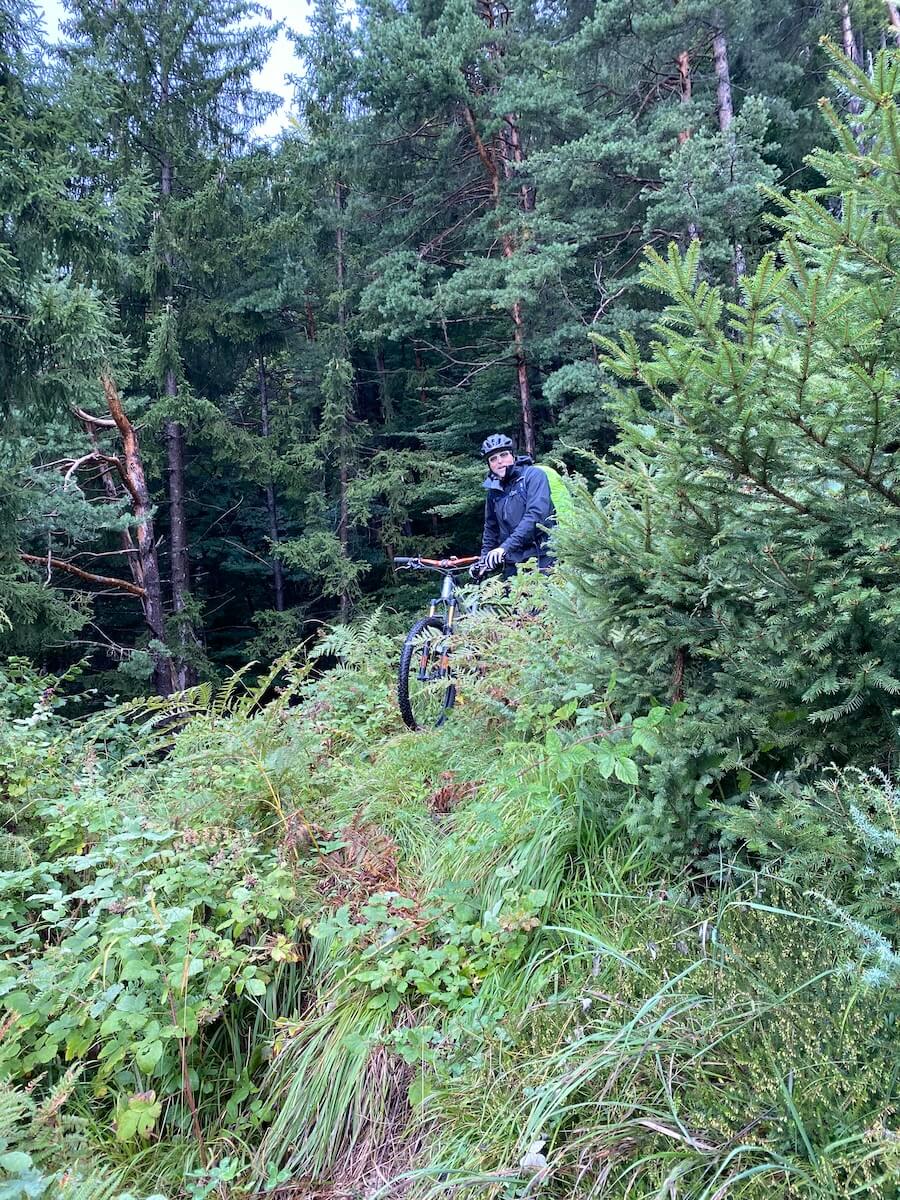
The descent to Zirl to get onto the cycle path towards Innsbruck was a tough one, at times we had to carry or push our bikes. The ground, soaked by the rain, didn't necessarily make riding any easier.
Christian then had a flat tire on the cycle path towards Innsbruck. Dismantling in the rain took forever, the coat was very difficult to remove. After what felt like hours, we finally made our way to our destination, the Hotel Stefansbrücke in the Stubai Valley.
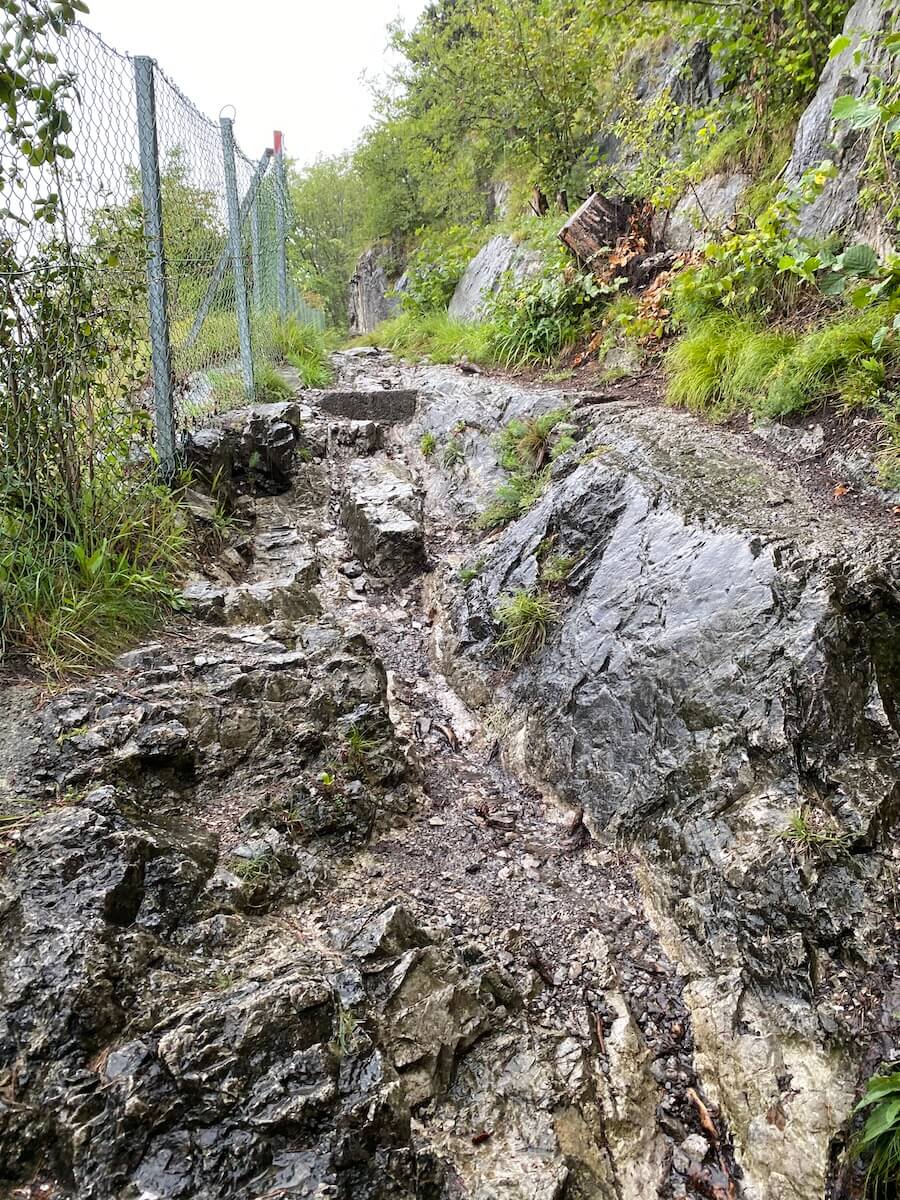
We were actually quite on time, the satnav led us past the Berg Isel ski jump through the Sillschlucht gorge to the hotel. Unfortunately, a completely flooded gorge awaited us and the path had completely disappeared.
We only had 2 options: Go all the way back and take the road to our destination or shoulder the bikes and climb cross-country up the gorge. Turning back was out of the question for us, so only option 2 remained. The ascent was very arduous and exhausting, it took the last of our energy. We were also running out of time, as the hotel kitchen was only open until 7:30 p.m. ....We finally arrived at the hotel at 7 p.m., had a quick shower and dried our clothes and then just in time for dinner.


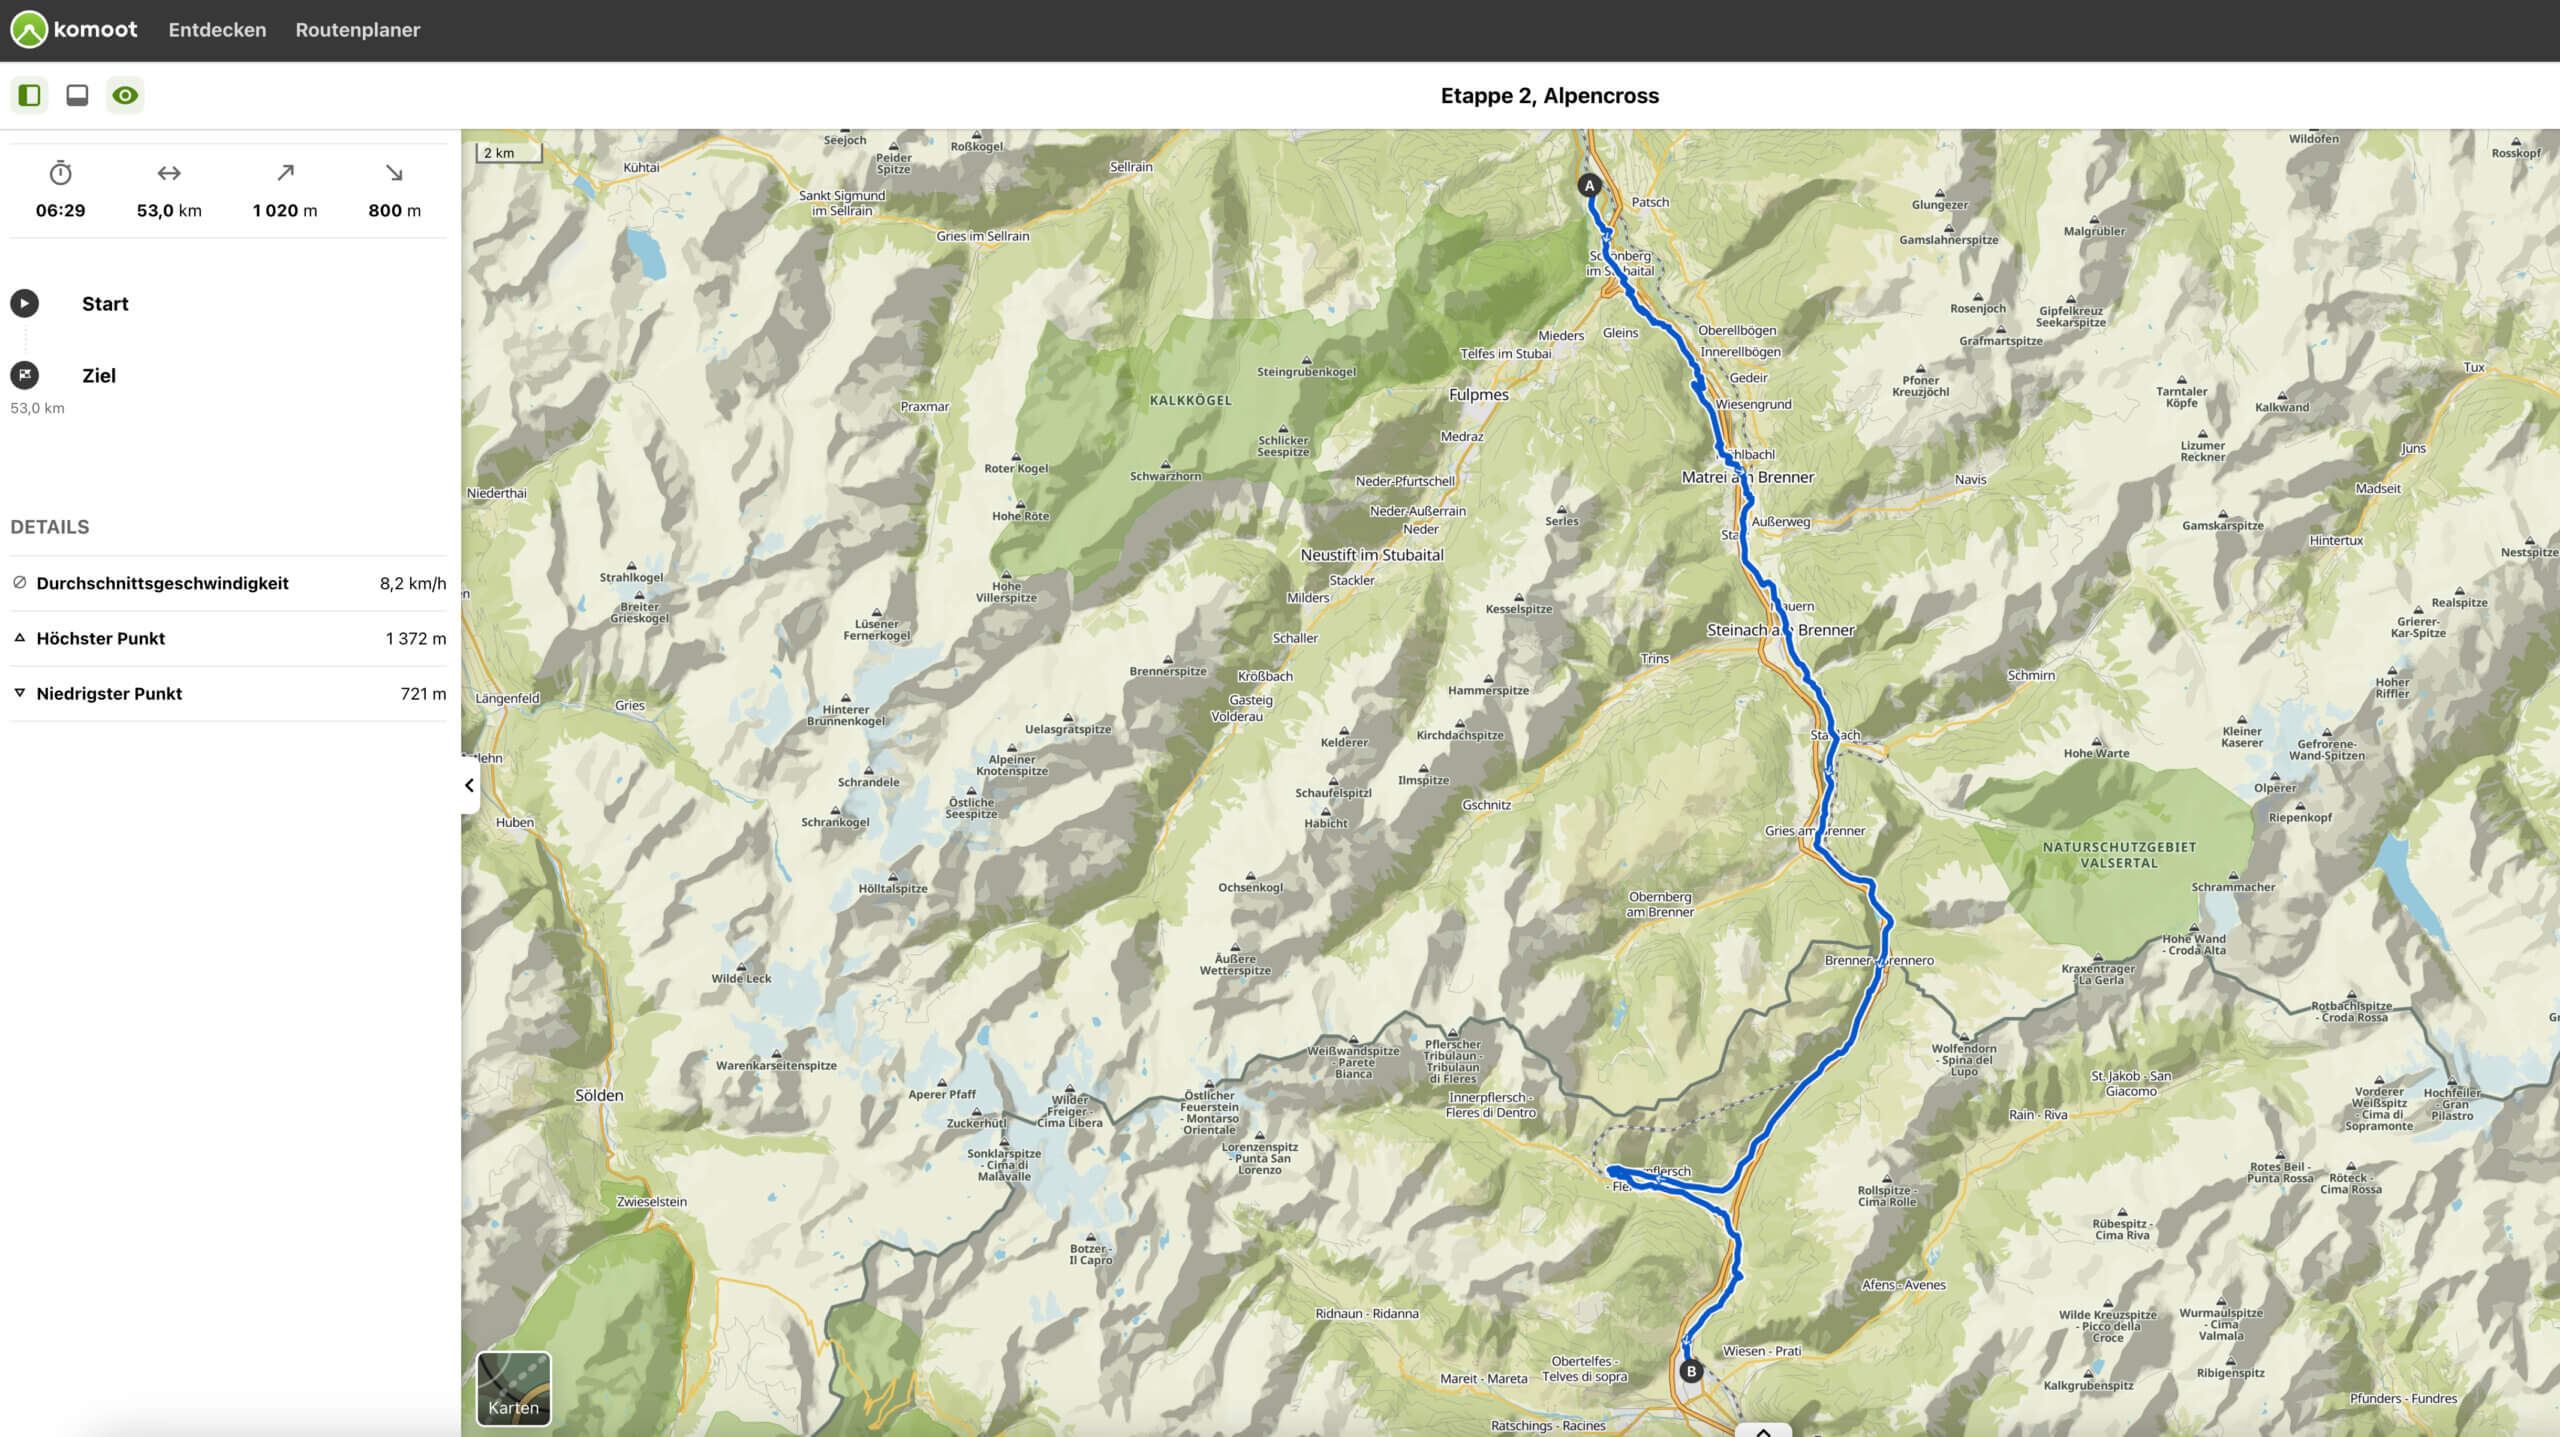
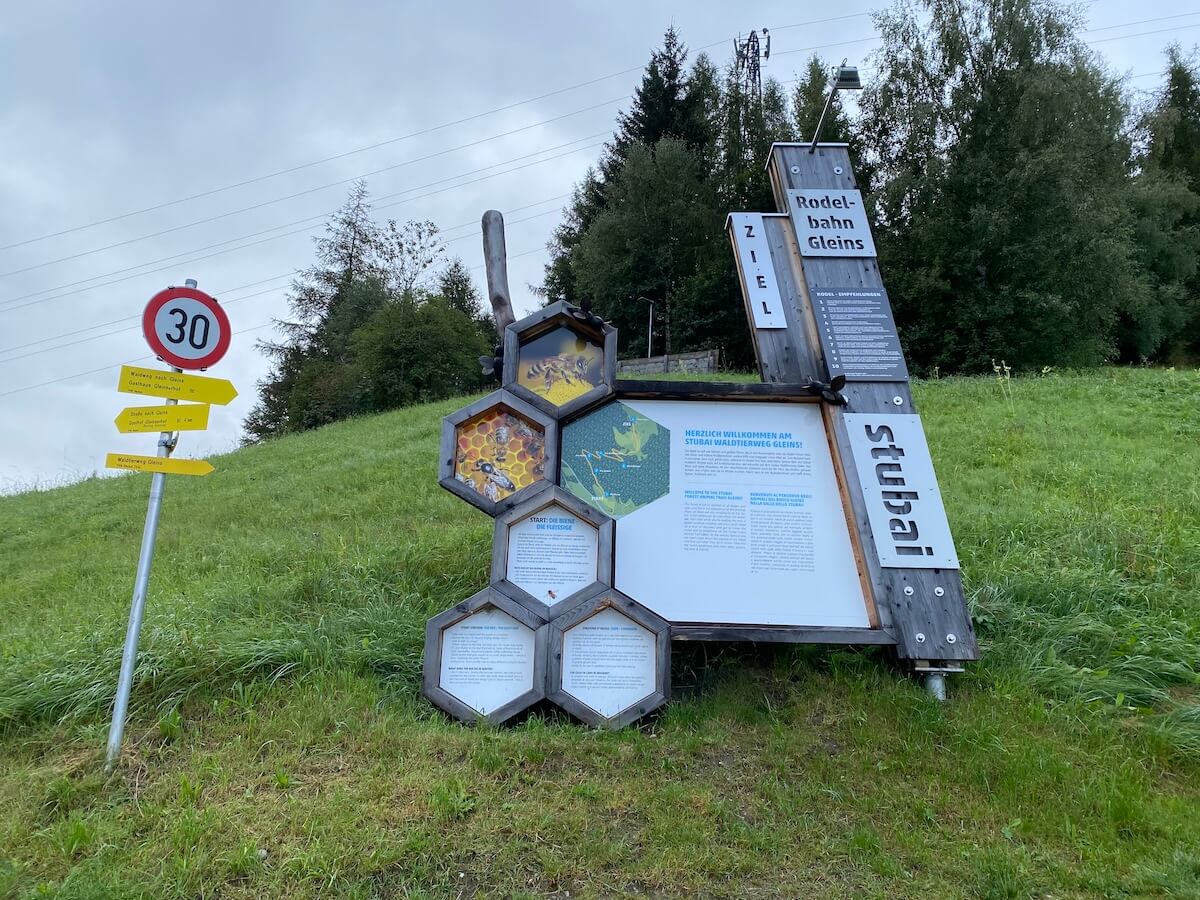
Stage 2: Schönberg- Brenner - Sterzing | 53 km, 1020 m difference in altitude
The second stage was supposed to be our queen stage with around 2000 meters of altitude and the Brenner border ridge. Unfortunately, the previous day's strenuous finish and the bad weather had sapped a lot of energy. As soon as I set off on the second stage, I realized that this was not going to be my day. The weather got a little better (less rain), but the temperatures had nothing to do with summer, but rather with fall.
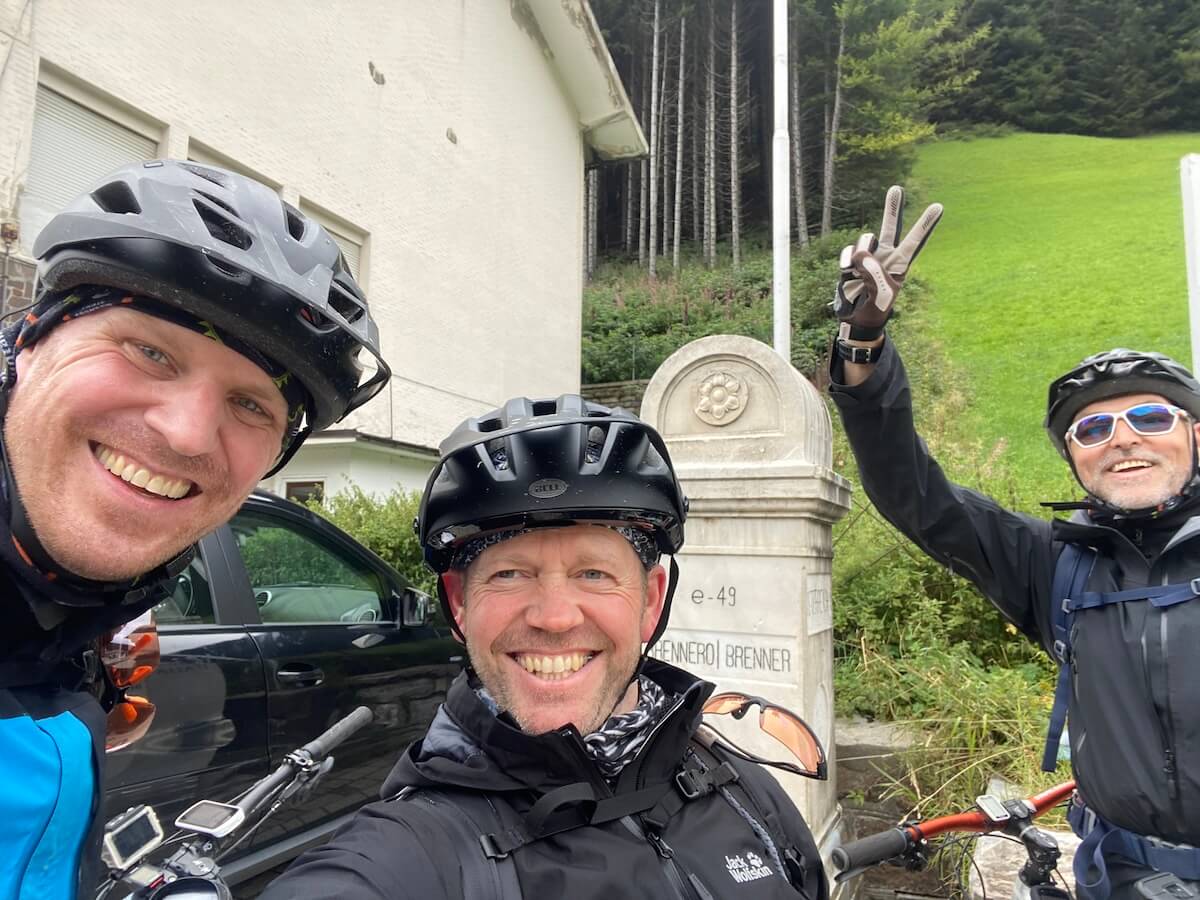
Even the ascent to the Brenner Pass was torture. I couldn't get any pressure on the pedal. Ralph and Christian seemed to have coped a little better with the previous day and were almost constantly at the front. Once we reached the top of the Brenner Pass, we had to decide whether we wanted to drive over the border ridge. Finally, another 1000 m were on the program. It was already early afternoon and our strength, the weather and the visibility spoke against this route. However, we resolved to catch up on this stretch at some point.
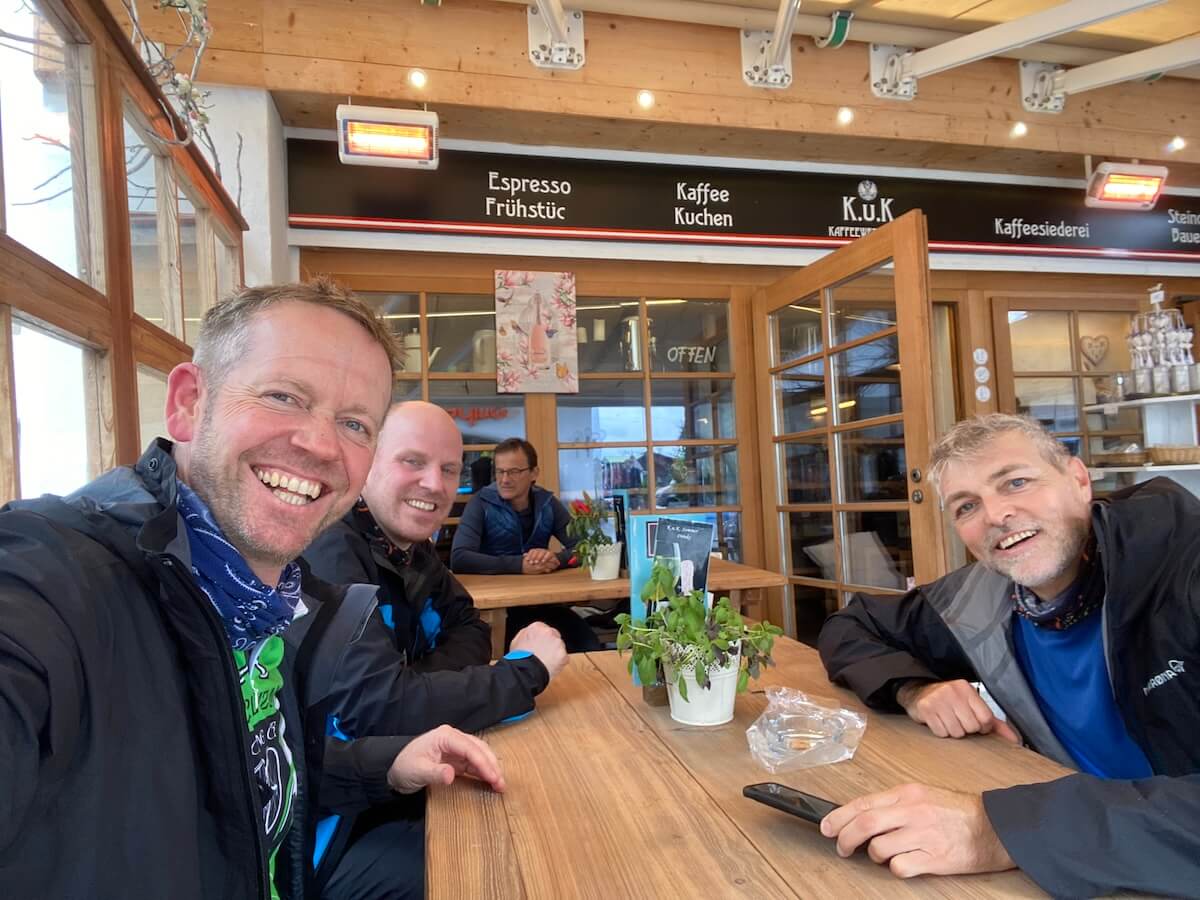
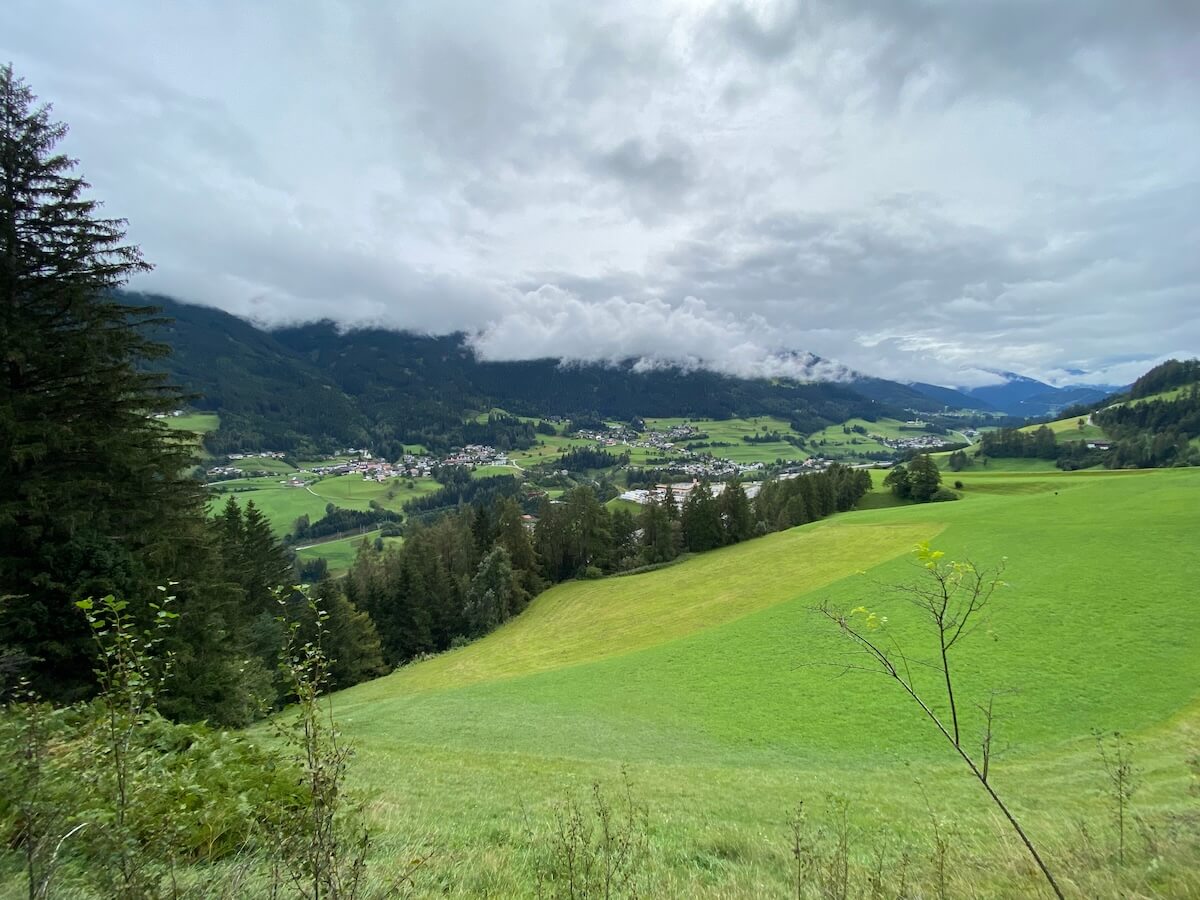
We continued across the Austrian-Italian border on the cycle path to Sterzing. The rapid descent was a treat for the legs, albeit unspectacular. We reached our stage destination in Sterzing (Hotel Mondschein) early and were able to recover a little from the exertions of the previous day.
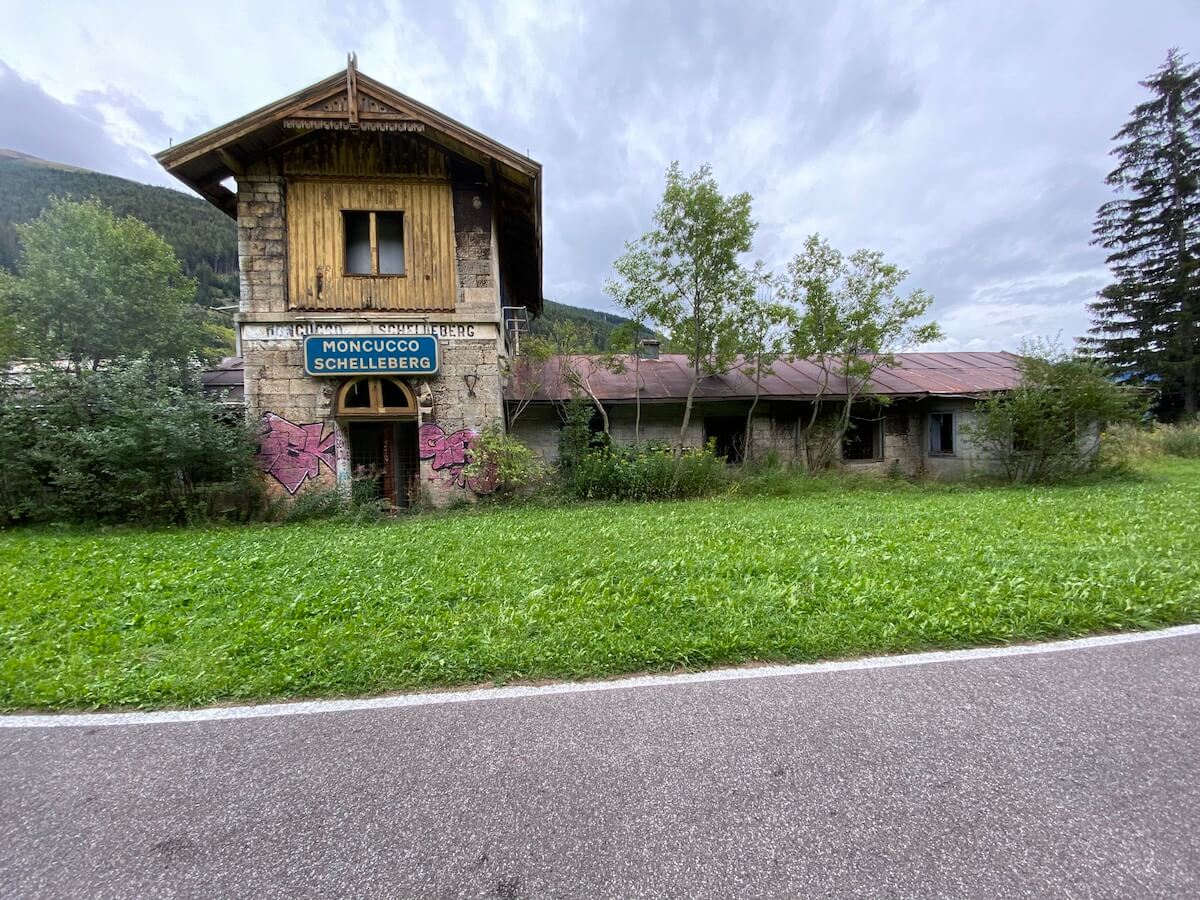
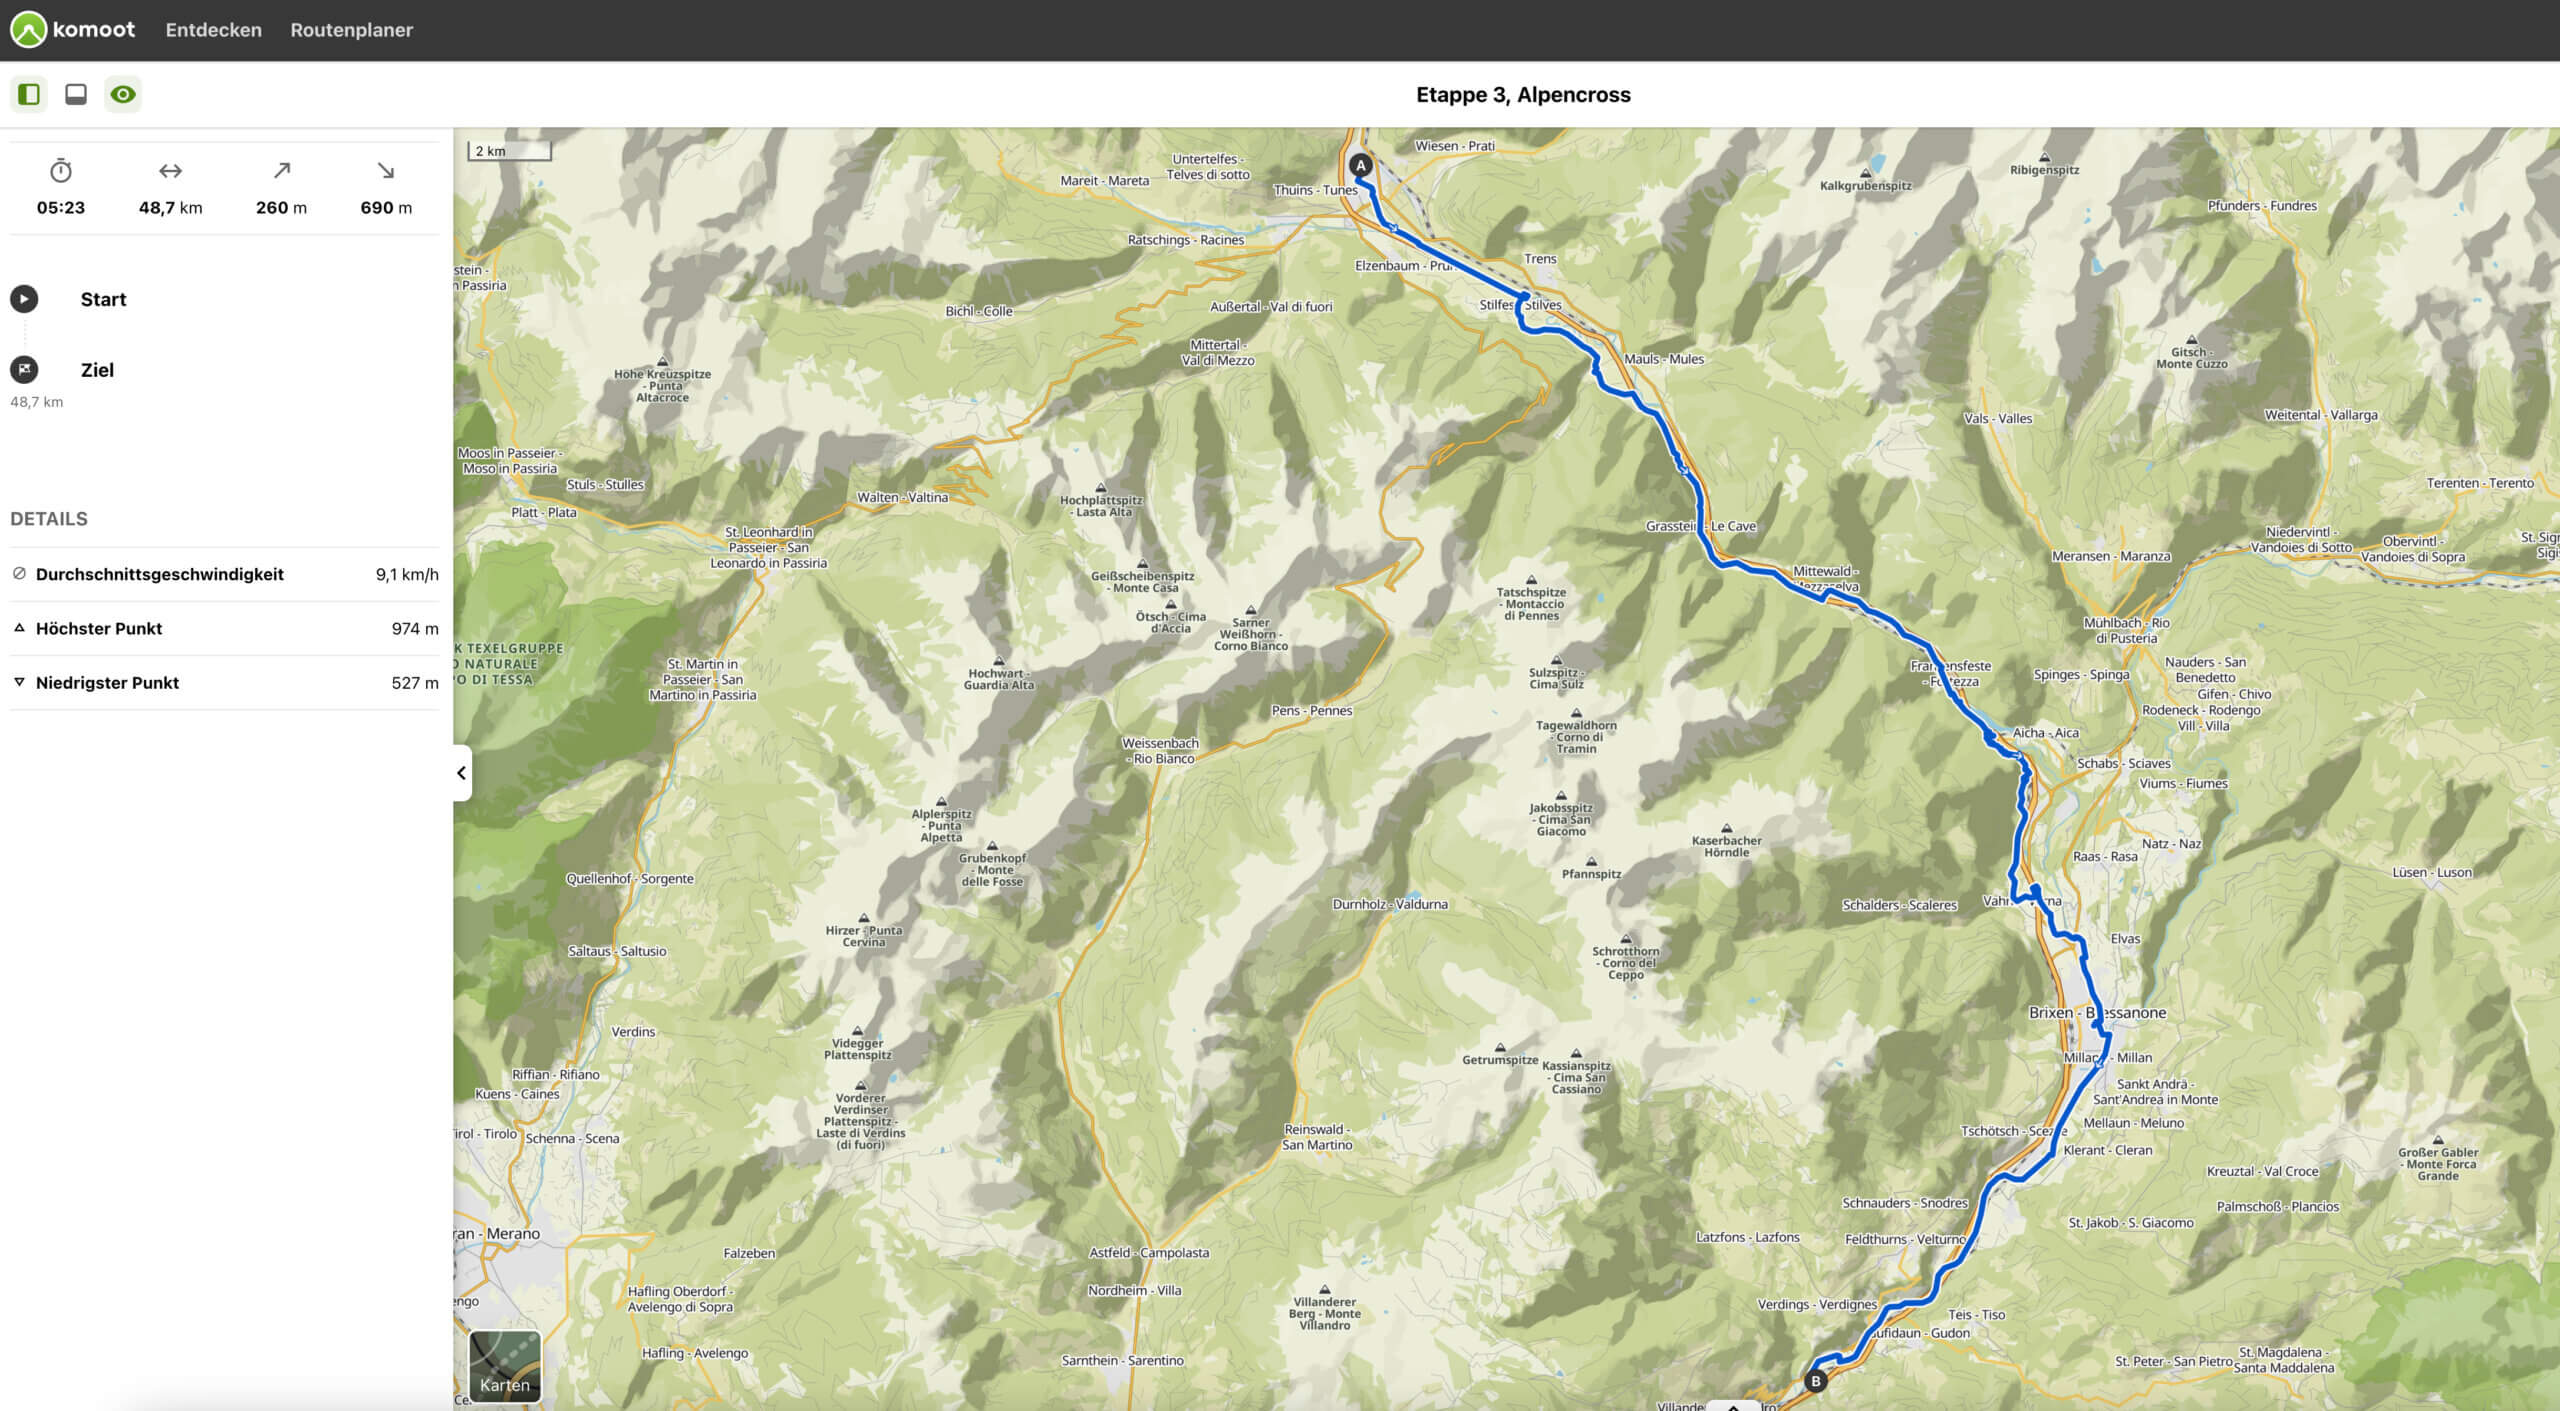
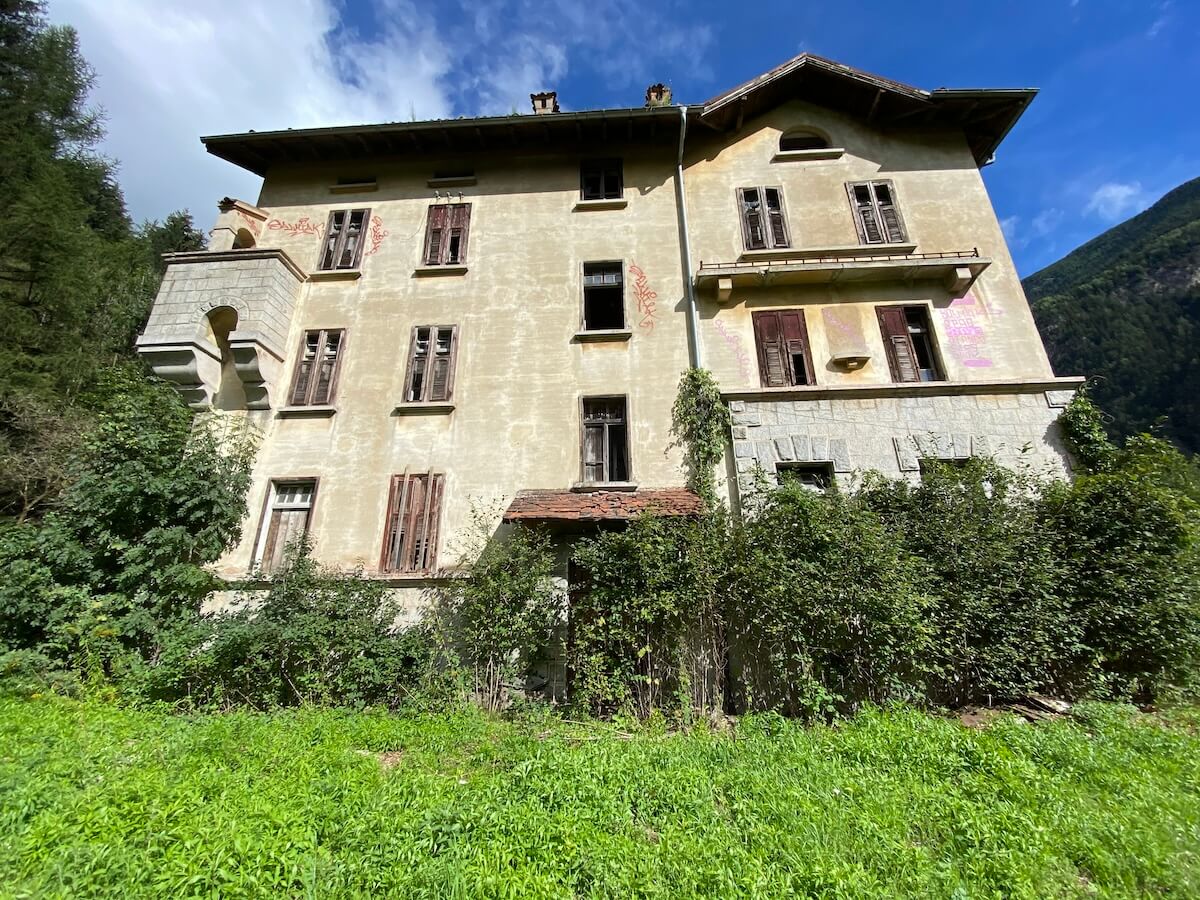
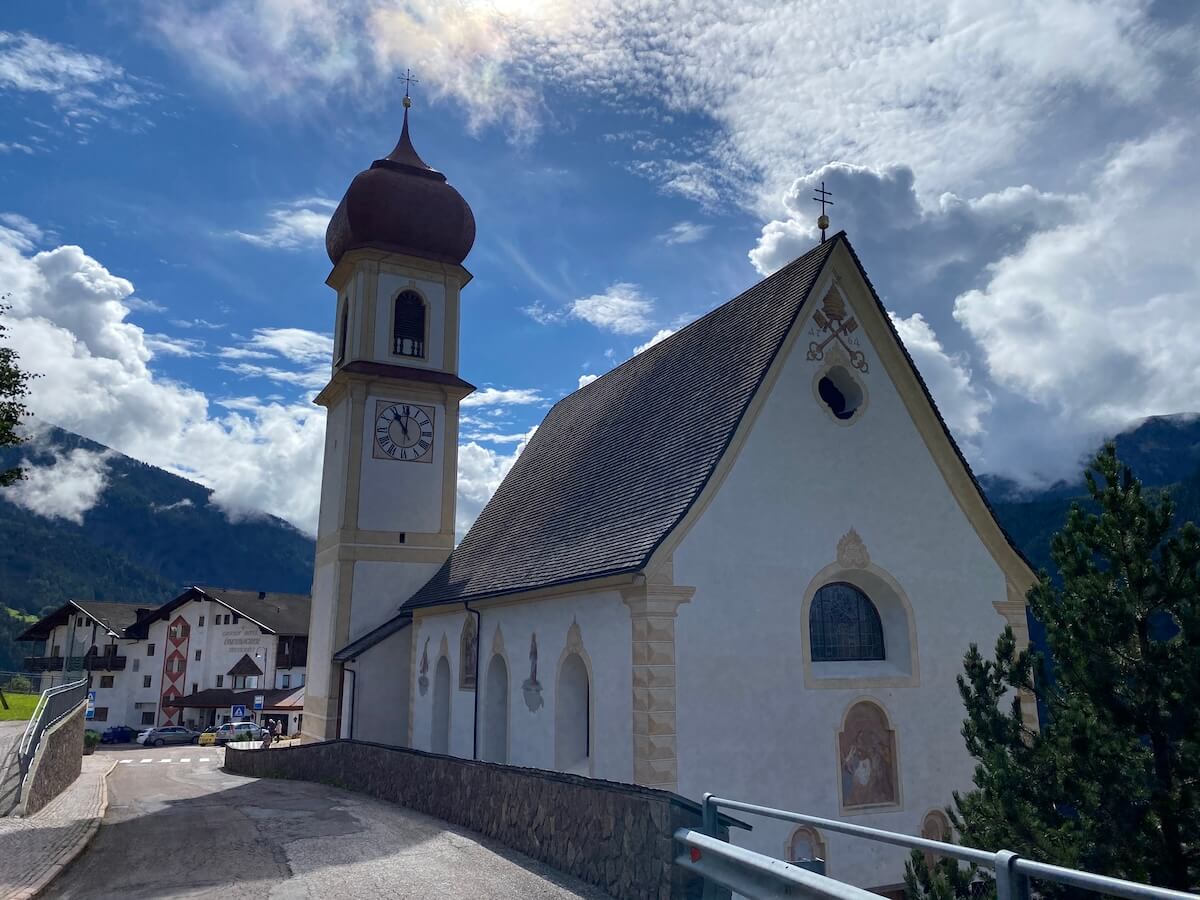
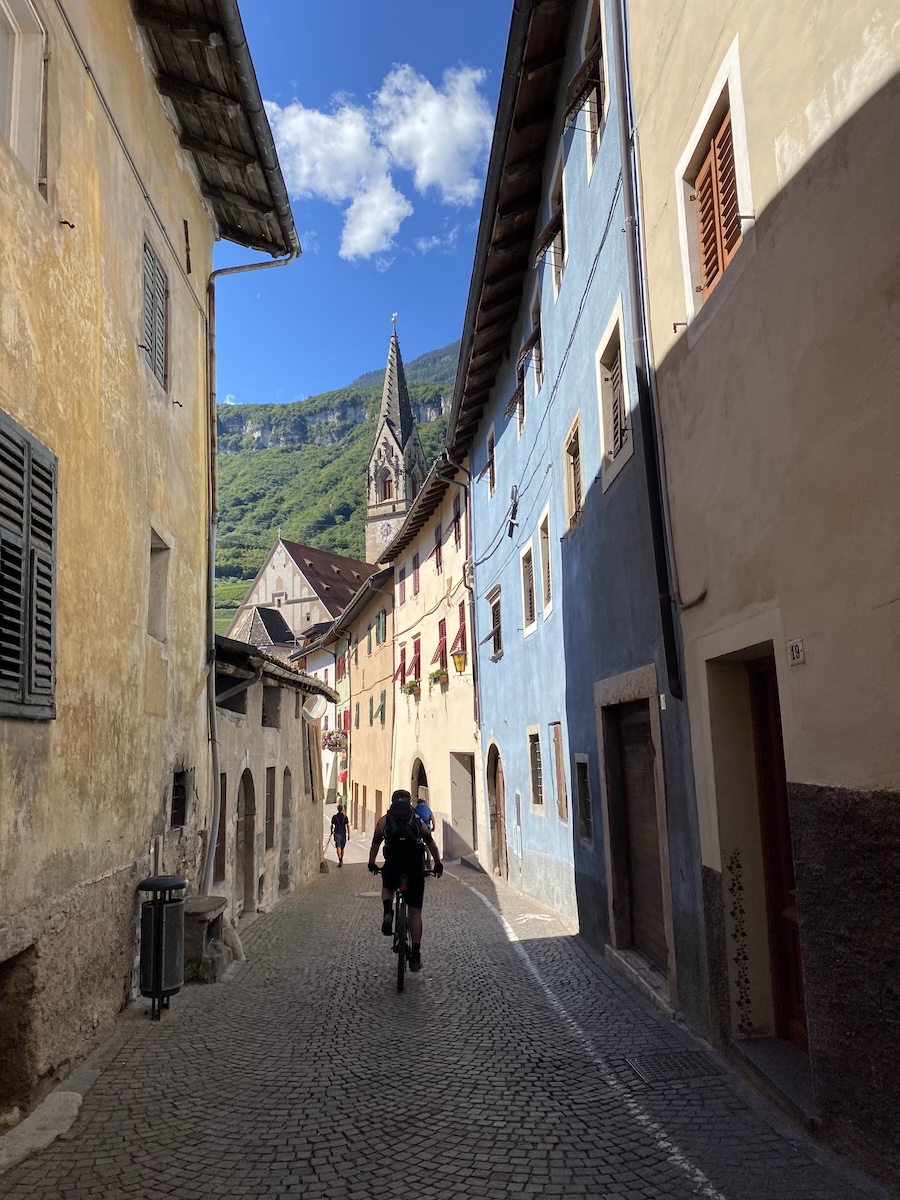
Stage 3: Sterzing - Klausen | 48.7 km, 260 m difference in altitude
Our third stage was planned as a recreational ride. As we had avoided the Brenner border ridge the day before, we were able to take a relaxed approach to this third stage and roll comfortably from Sterzing to Klausen.
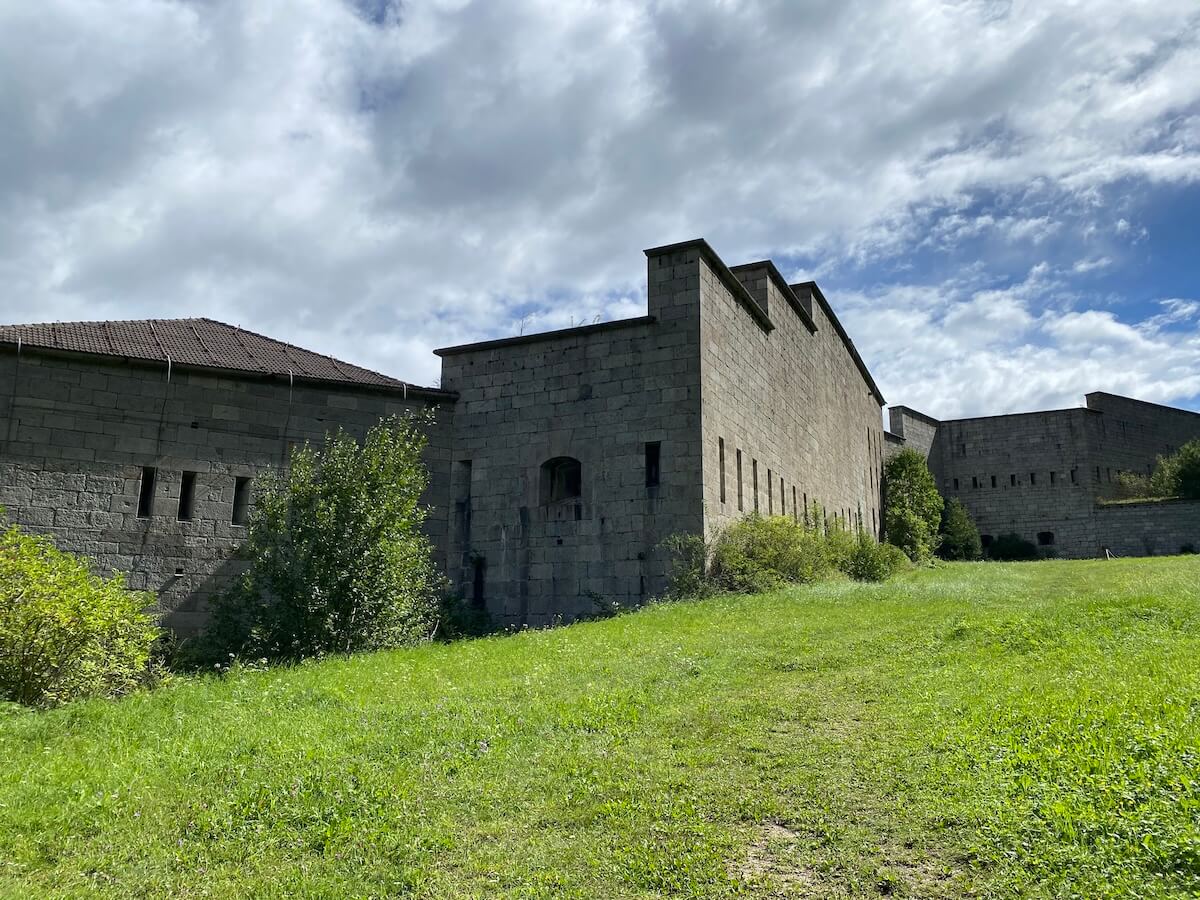
We made a short detour to Franzenfeste Castle to at least have a few meters of altitude on the clock. We reached the Hotel Bischofshof in Klausen via the Vahrner See lake and the beautiful town of Brixen.
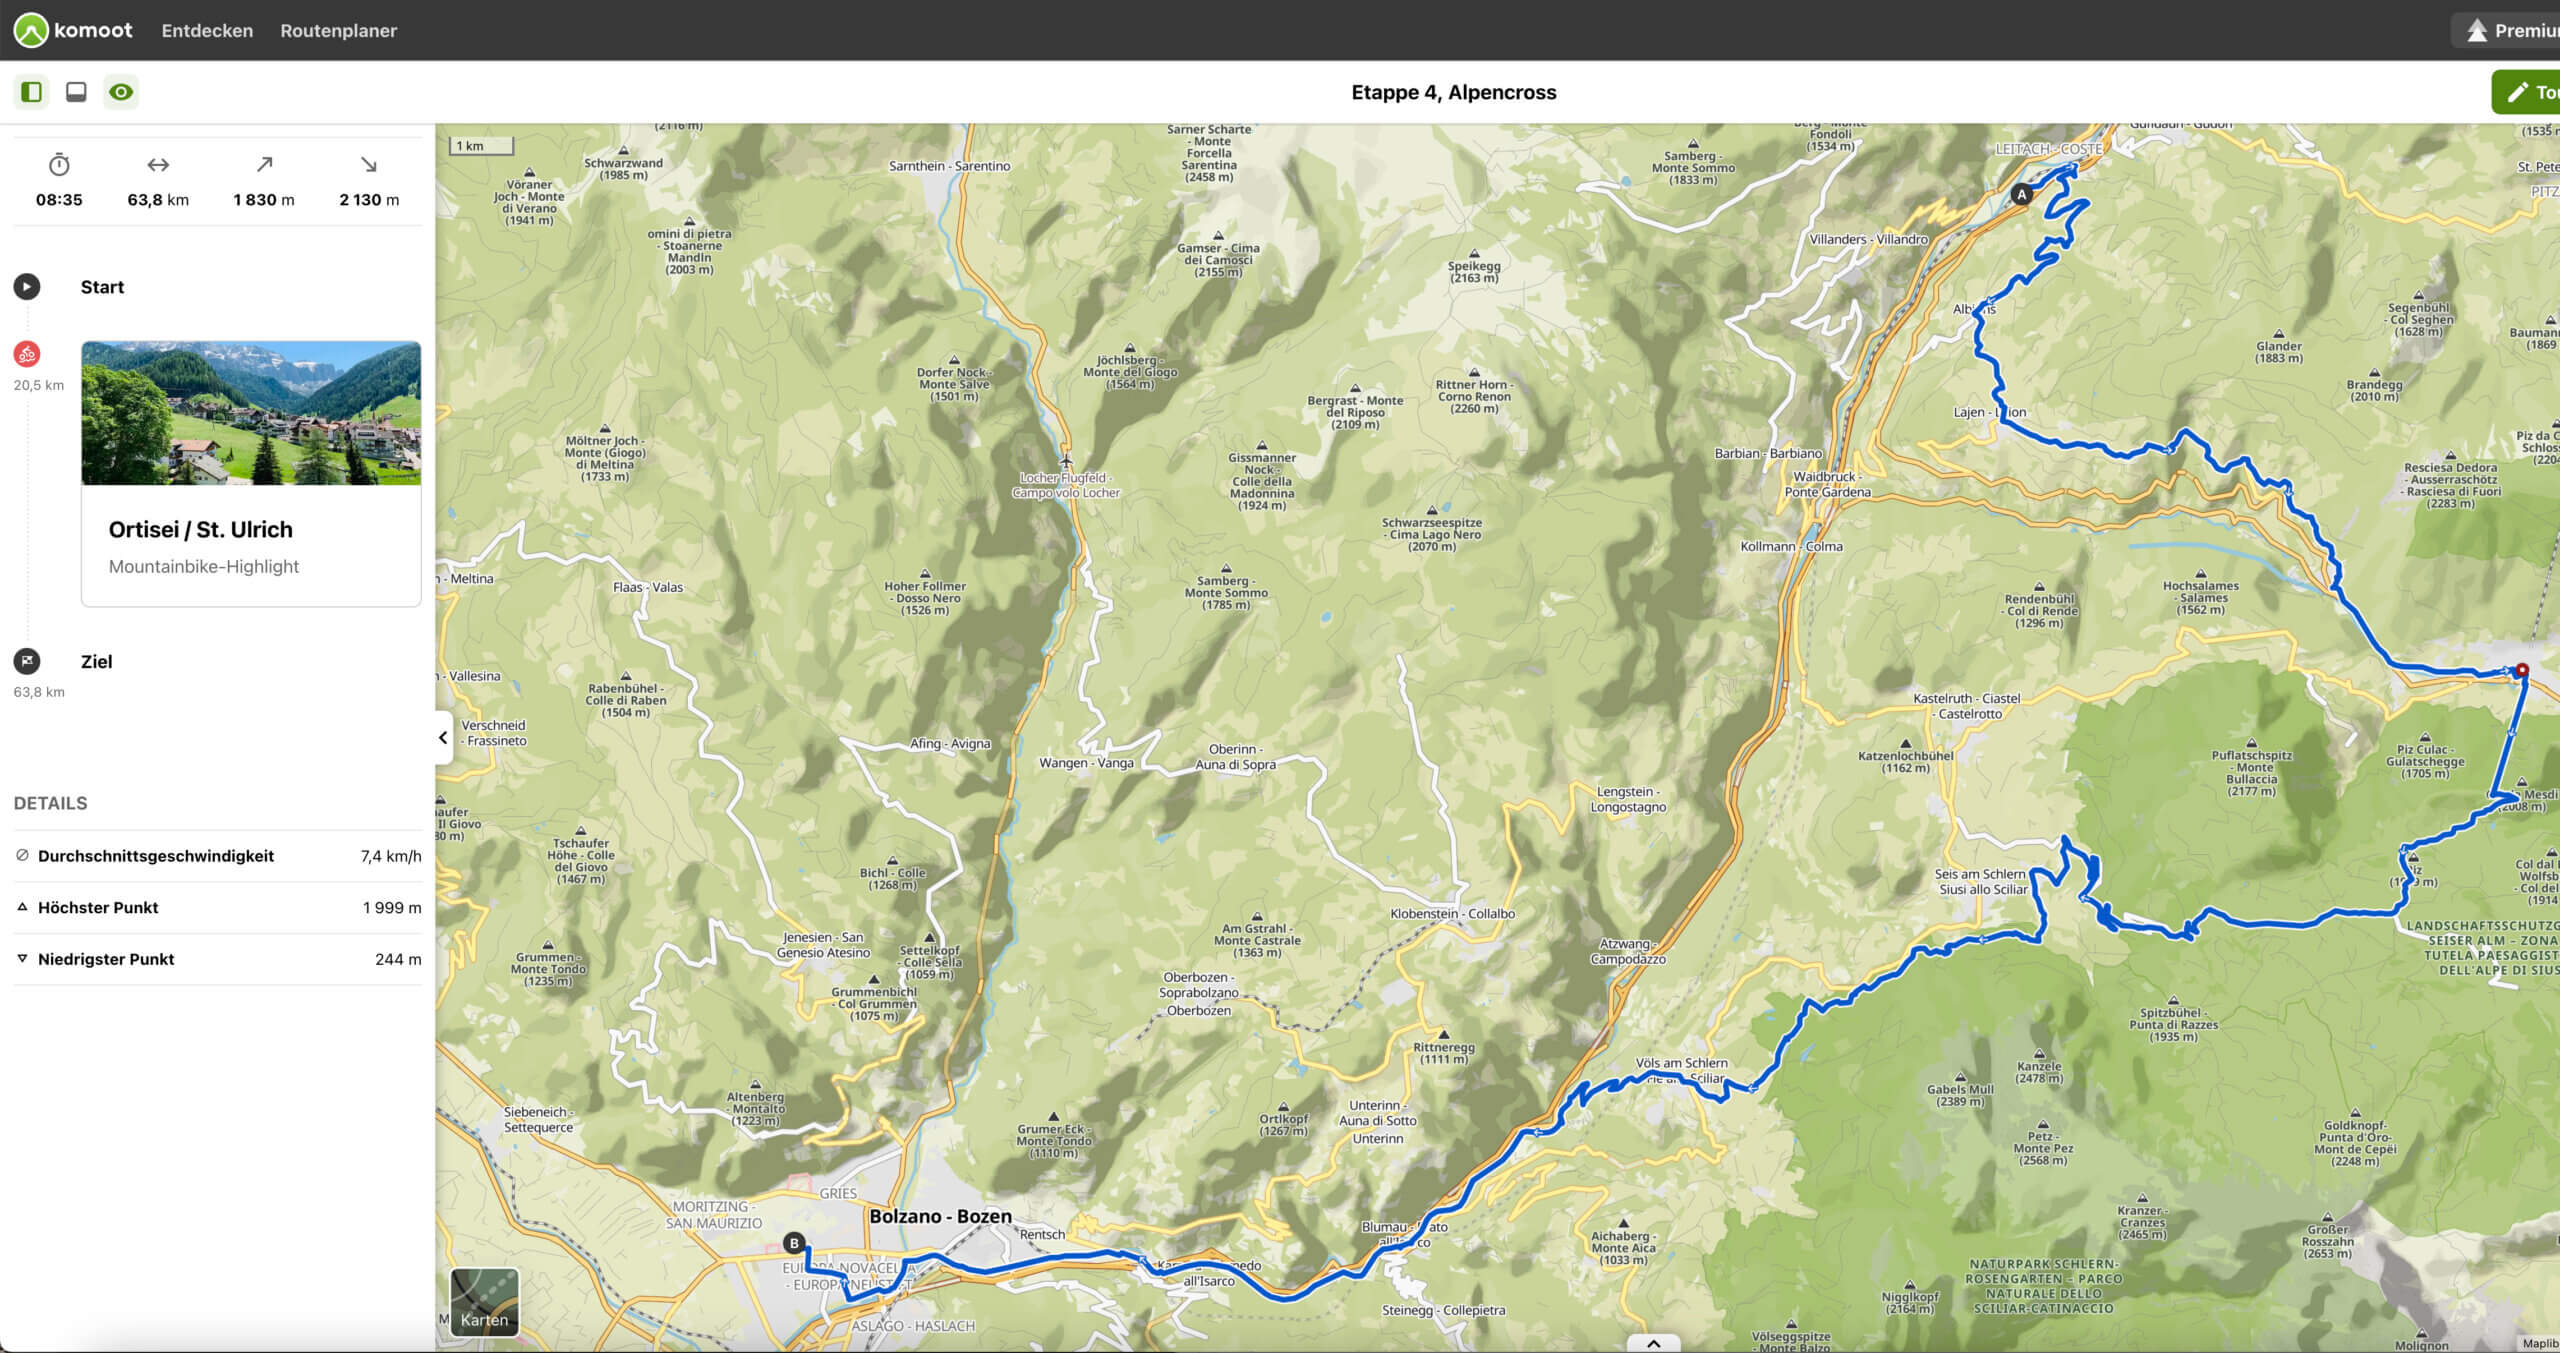
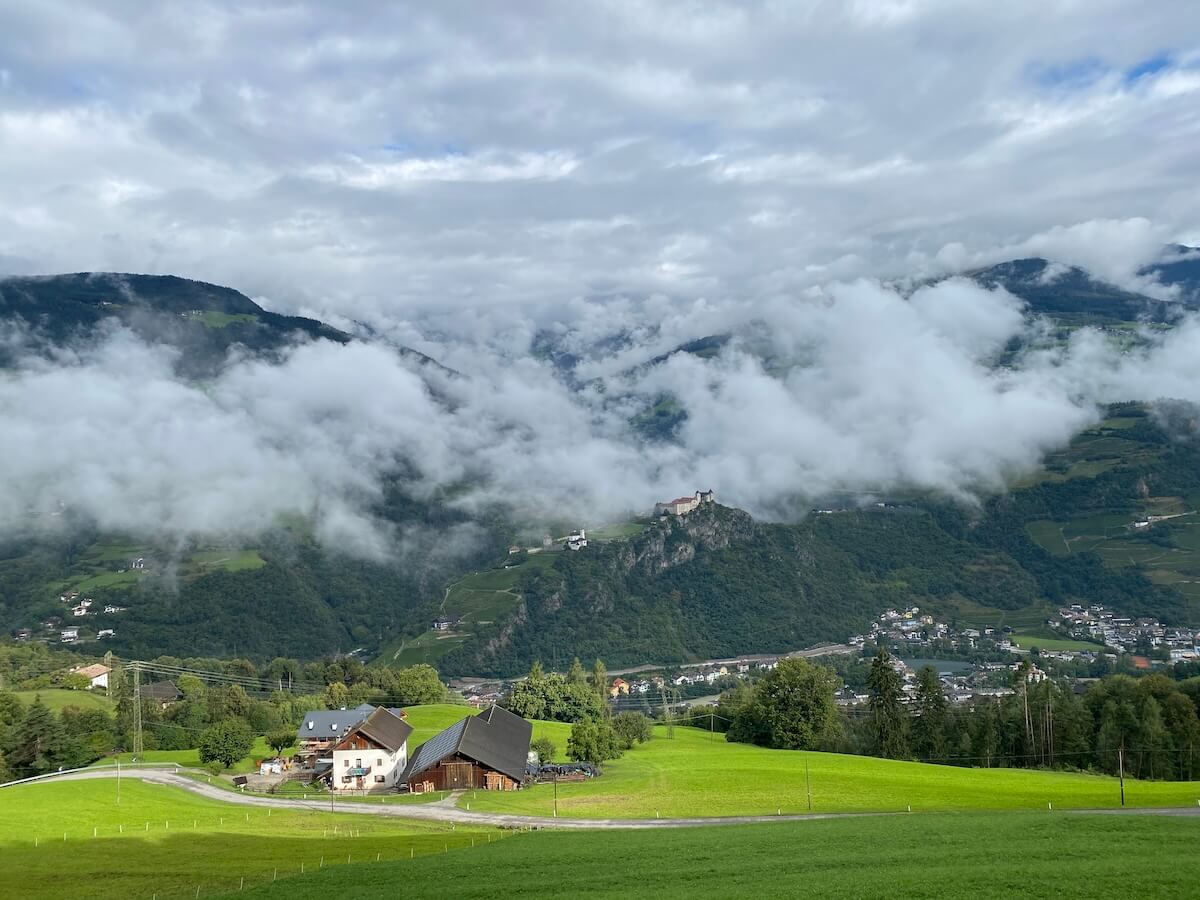
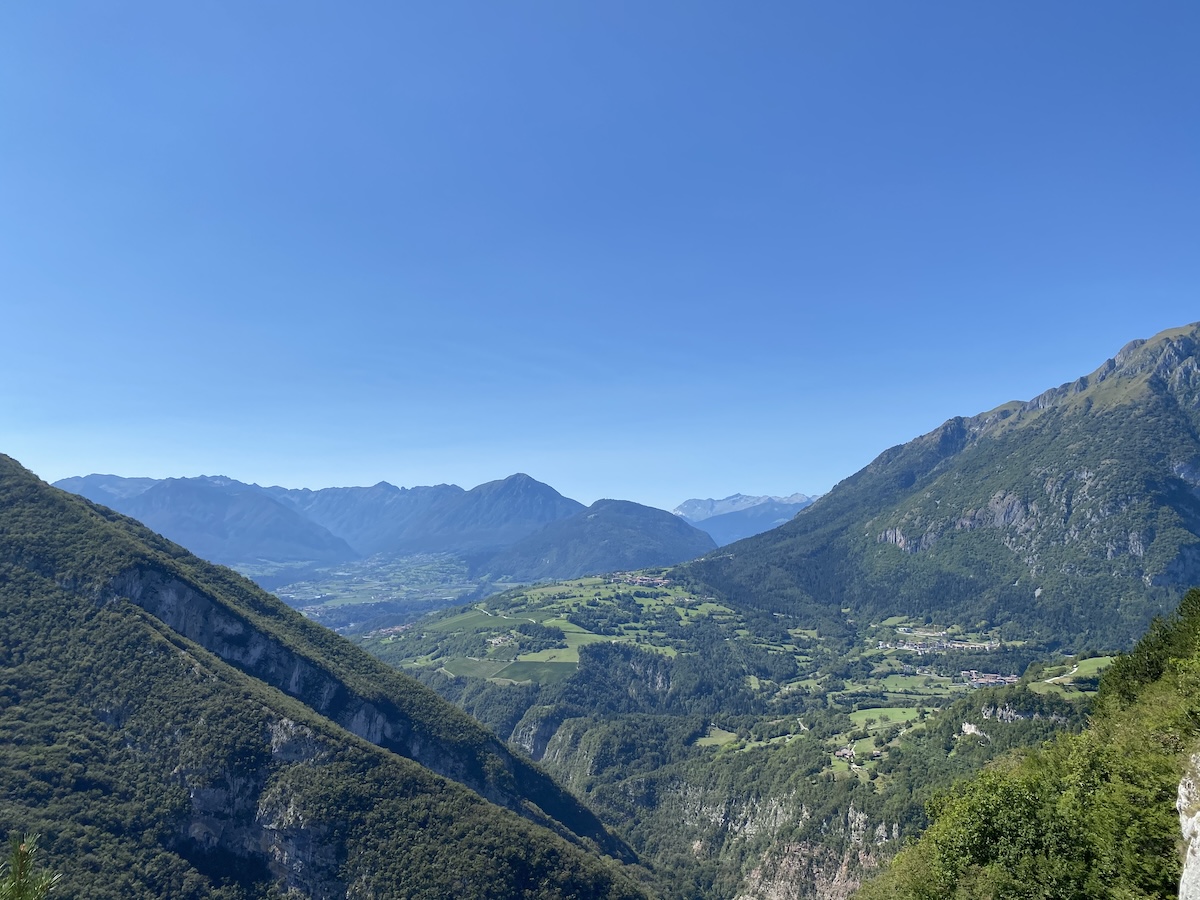
Stage 4: Klausen - St. Ulrich - Seiser Alm - Bozen | 63.8km, 1830 m altitude difference
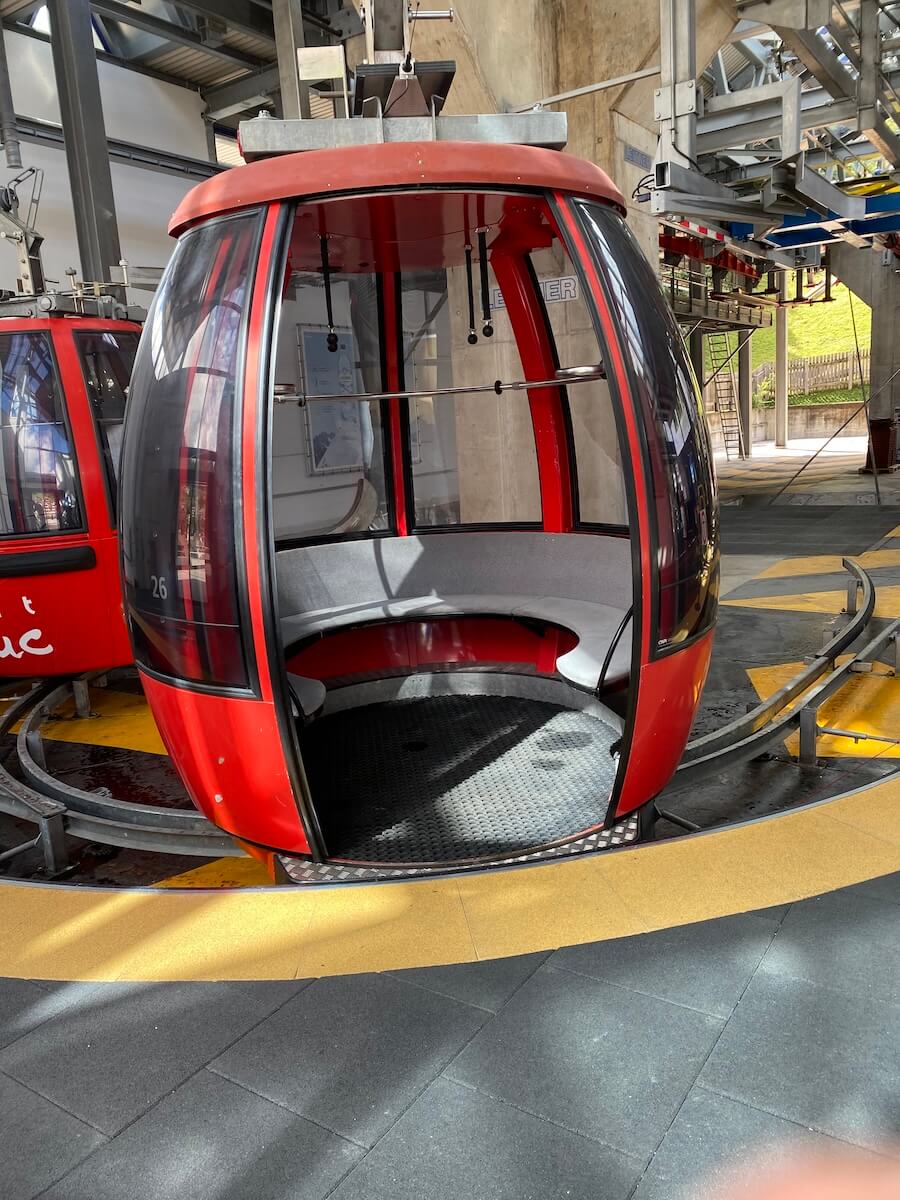
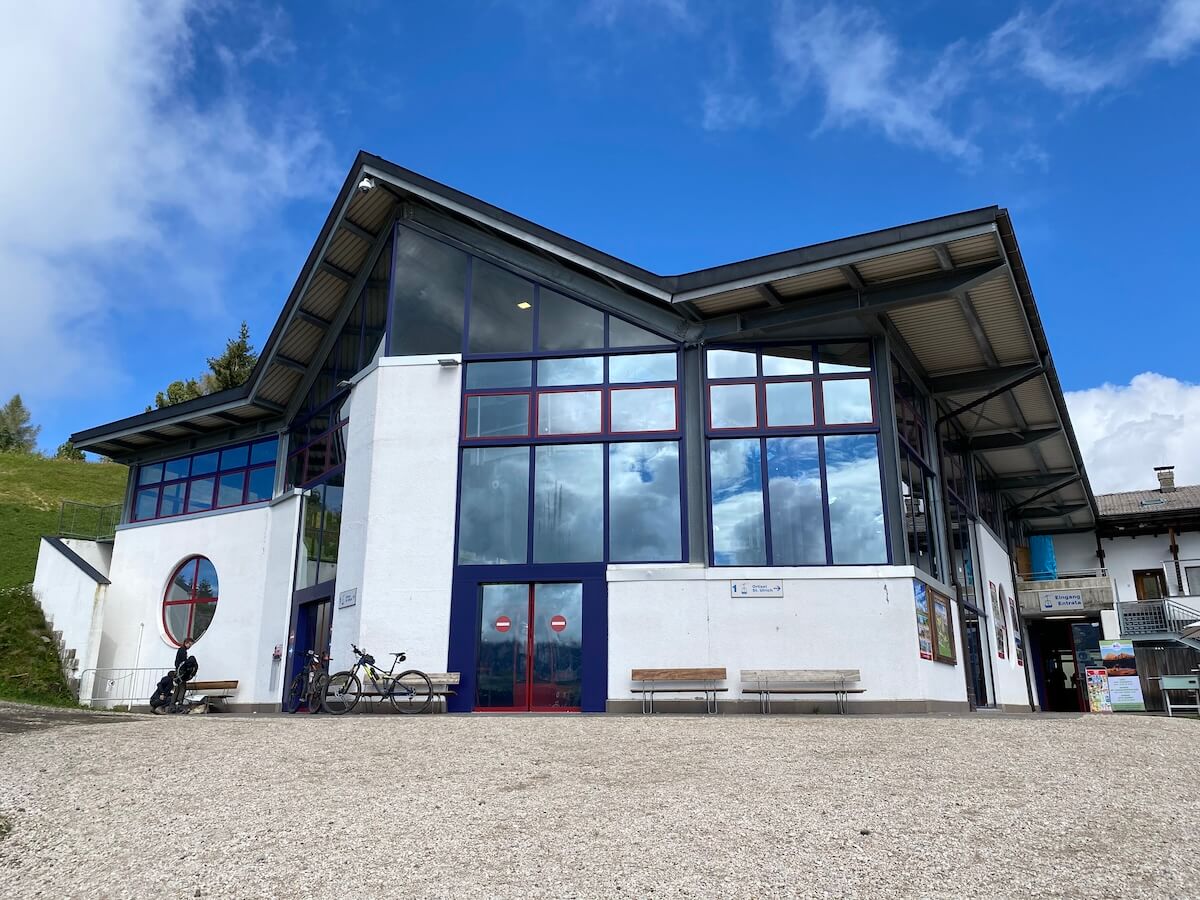
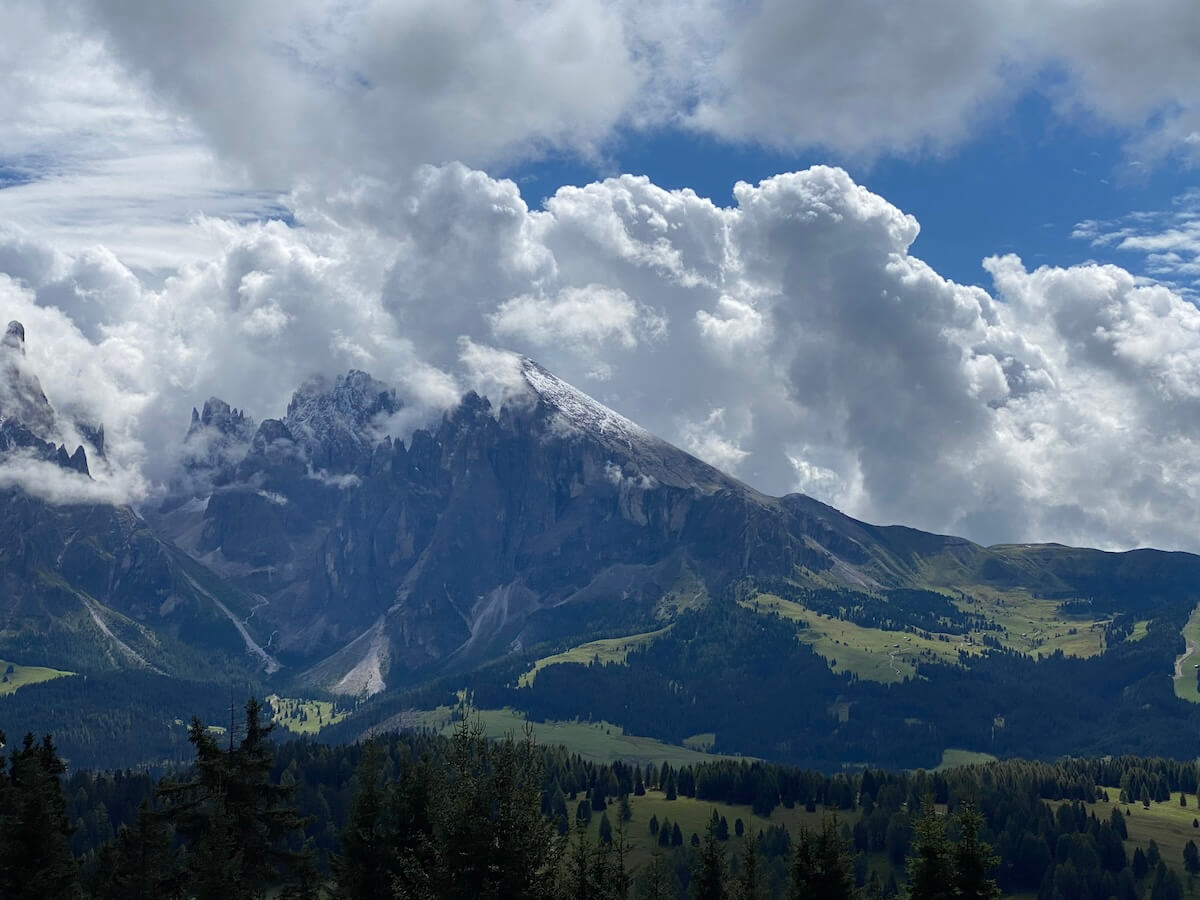
Our 4th stage over the Seiser Alm to Bolzano was a special treat. First we went to Ortisei and from there we took the cable car to the Alpe di Siusi. So we were able to conquer around 1000 meters of altitude in the gondola 🙂
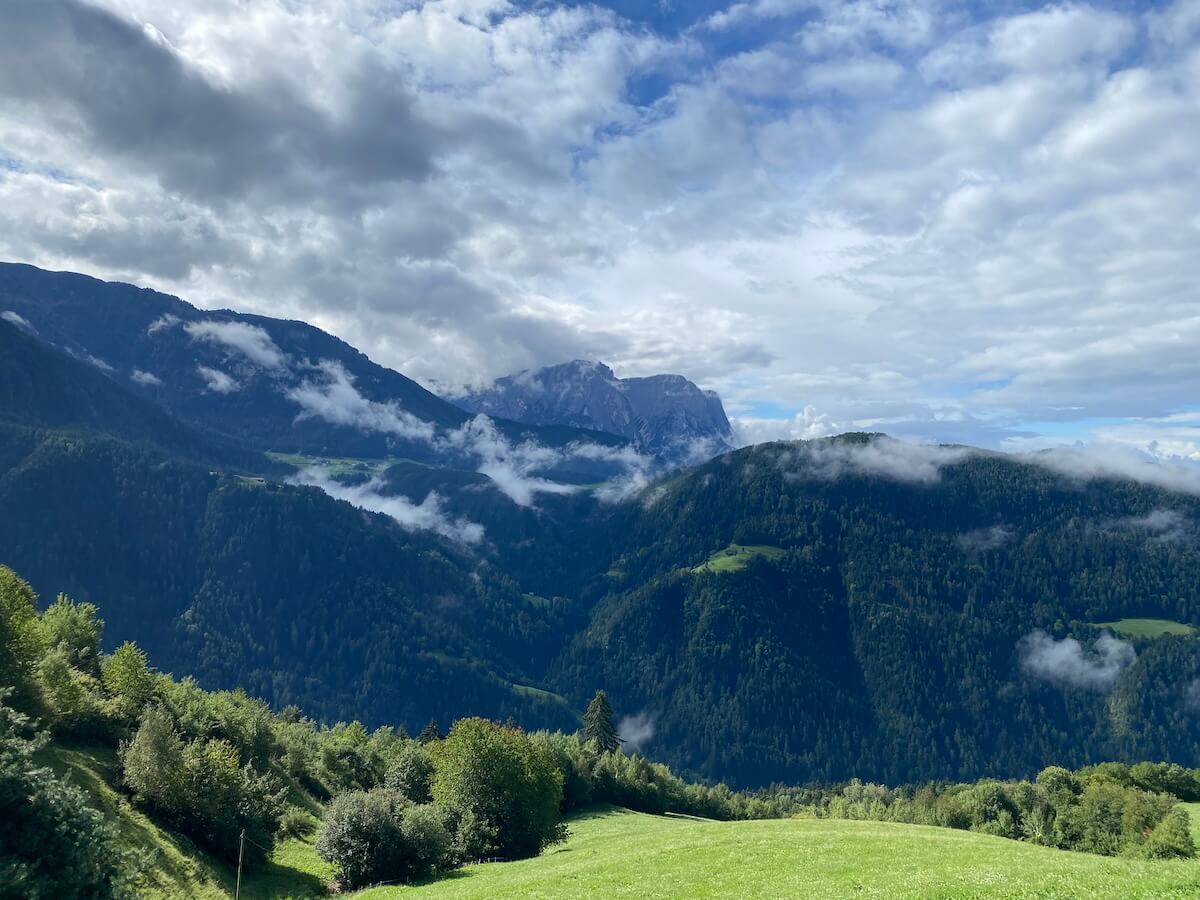
Once we reached the top, we enjoyed the fantastic view of the Dolomites and were finally able to soak up some sun.
The descent into the valley was challenging in places, but rideable throughout. We rode the last few kilometers to Bolzano on the Adige Valley cycle path until we finally arrived at the Hotel Chrys in Bolzano.
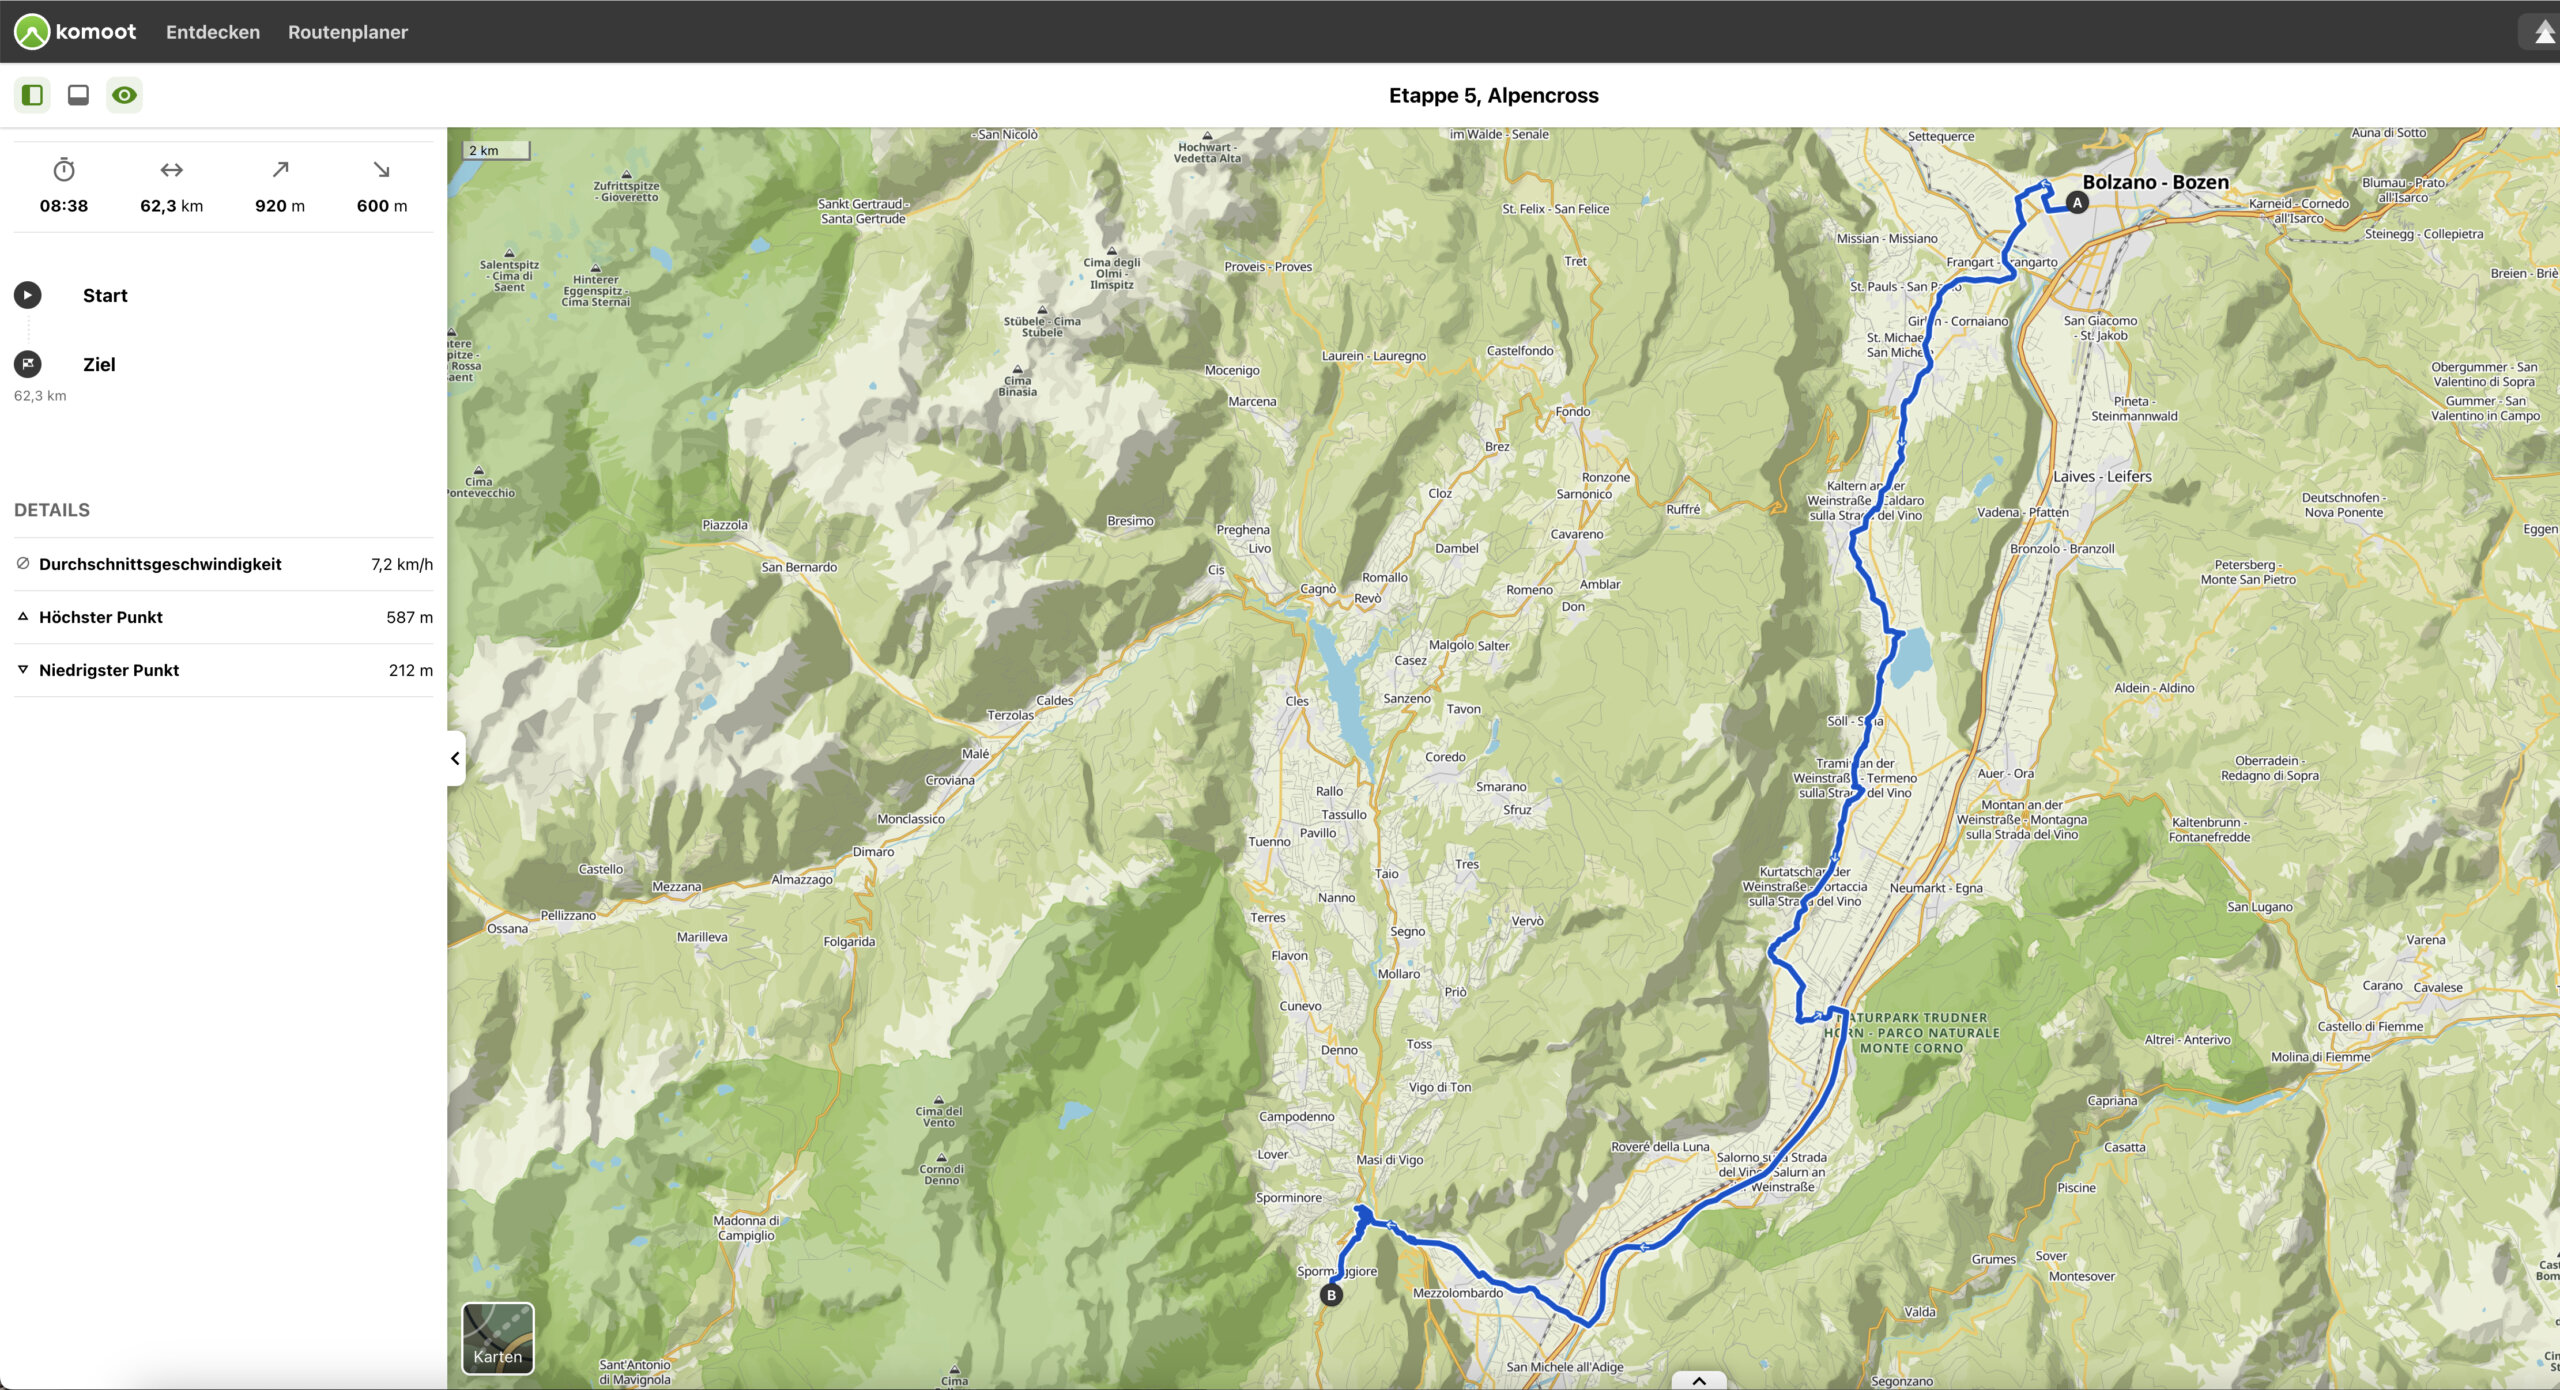
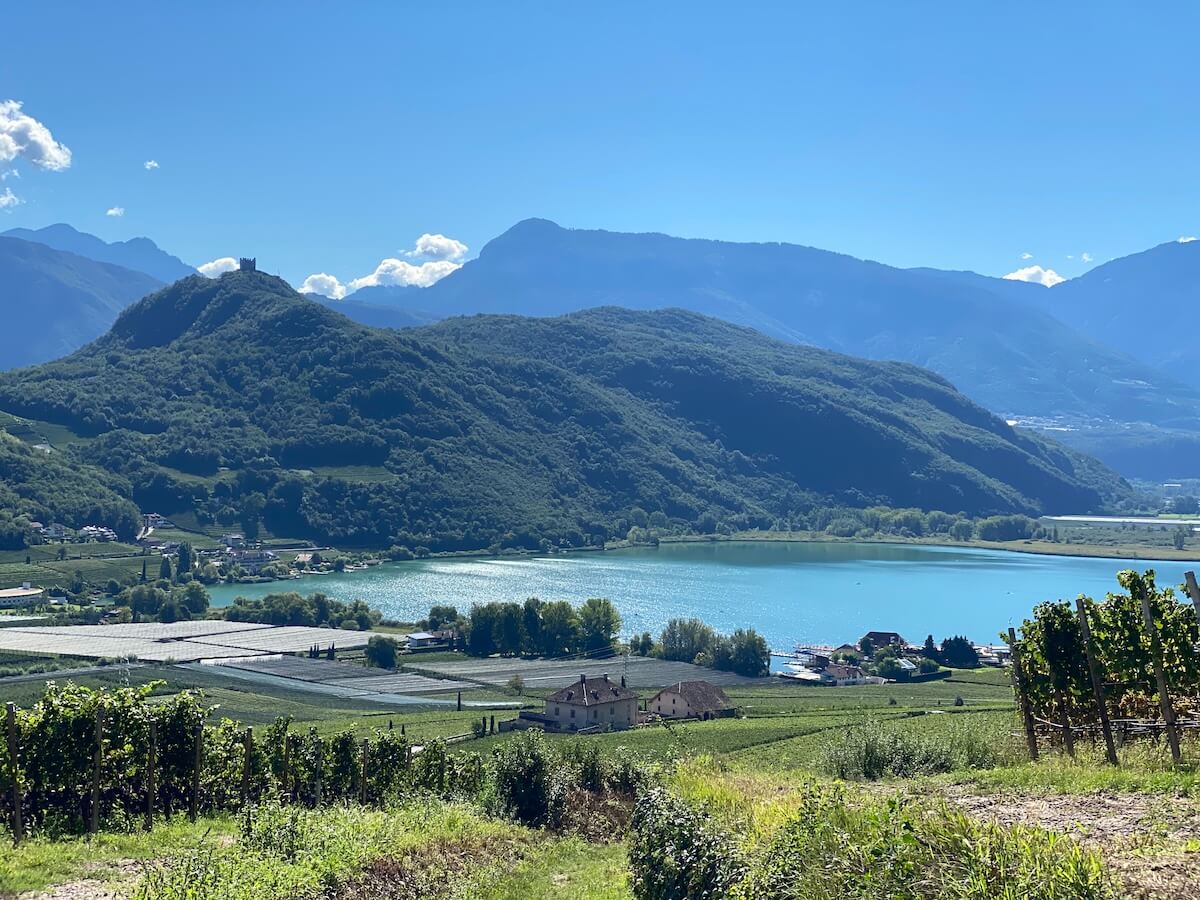
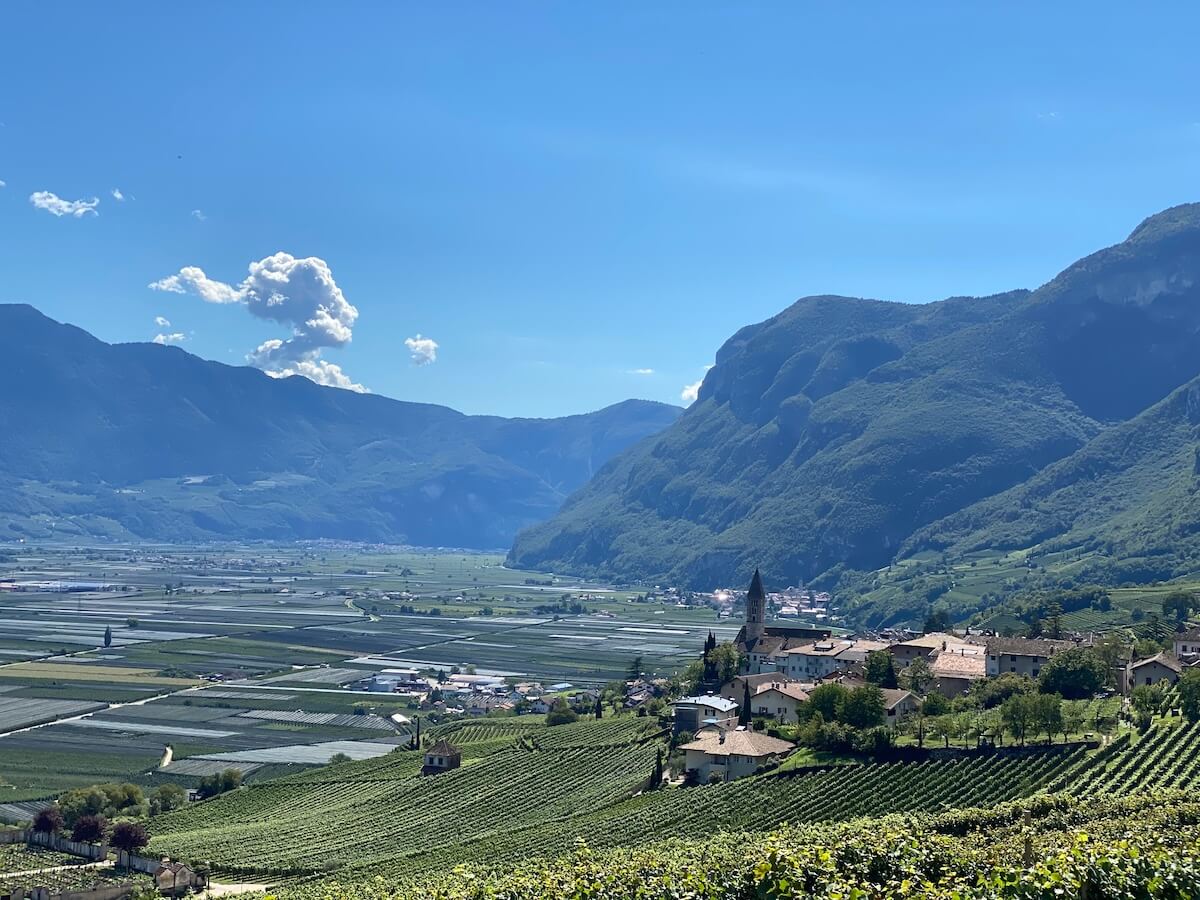
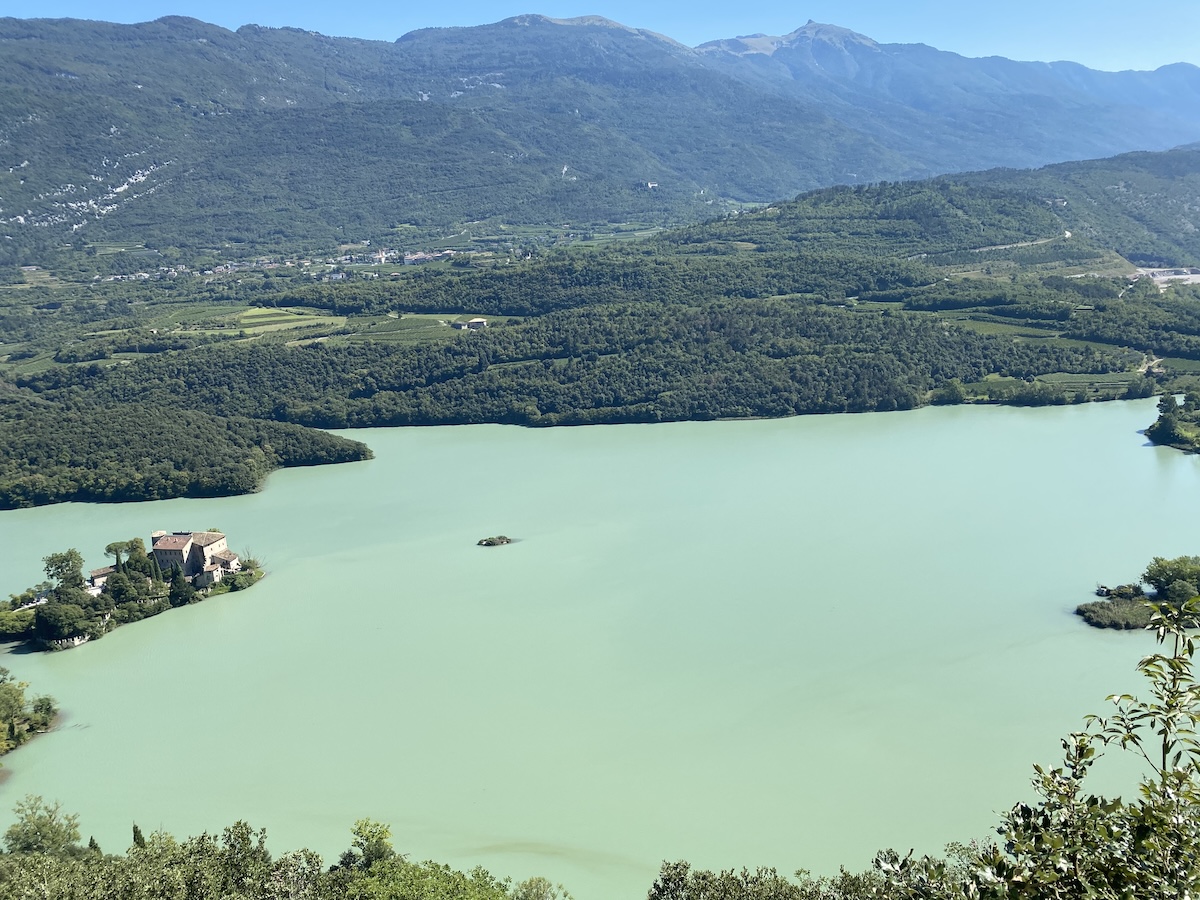
Stage 5: Bolzano - Lake Kaltern - Spormaggiore | 62.3 km, 920 m difference in altitude
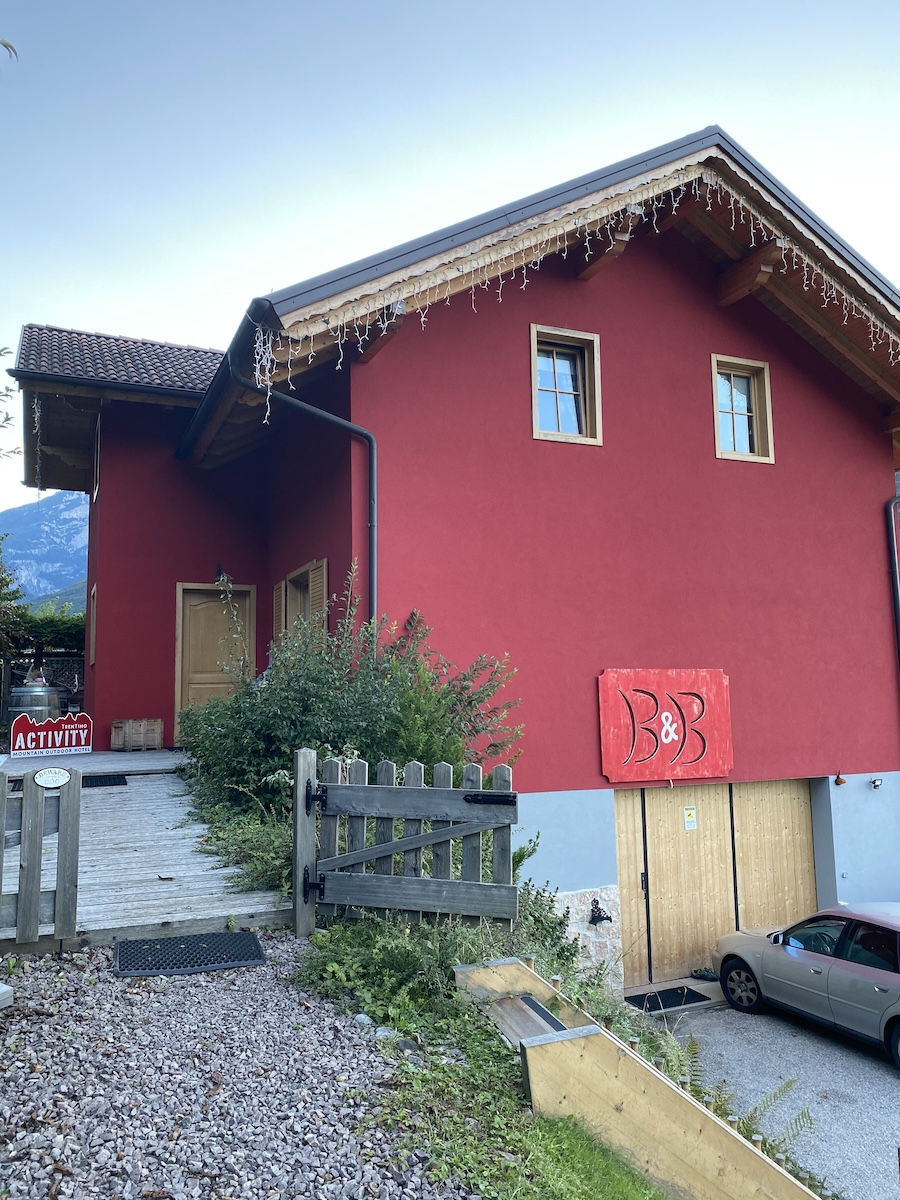
Our fifth stage took us from Bolzano along the South Tyrolean Wine Route past Lake Kaltern to Spormaggiore. After another stopover in Tramin and a glass of wine, we continued along the vineyards towards our stage destination, the Activity Appartamento Vacanze in Spormaggiore.
Unfortunately, some of the paths were completely blocked, so pushing and carrying was the order of the day. According to Komoot, these should all be passable cycle paths, but we were proven wrong. A little tip: you should take a closer look at hiking trails that are signposted as MTB trails.
After a while, pushing and carrying the bike got on my nerves, so I suggested cycling the rest of the way up to Spormaggiore on the cycle path. Ralph's enthusiasm was limited, he hates cycle paths. Nevertheless, we decided to take the Etschtalweg to Mezzocorana.
After a few kilometers, Ralph began to curse. His Maxxis tire literally stuck to the bike path, the rolling resistance was immense. That took a lot of energy and Ralph had to struggle a lot in the end. Well, that's how I felt on the second day...
Unfortunately, the ascent from Mezzocorana to Spormaggiore initially led along a busy road. That wasn't so much fun, but luckily we were able to drive to our destination on side roads after a short time.
When we arrived at our destination, we received a very friendly welcome from the owner. She and her husband gave us tips for the next day. Our tour planning included a different route and we were very grateful for the alternative suggestion, which we implemented.

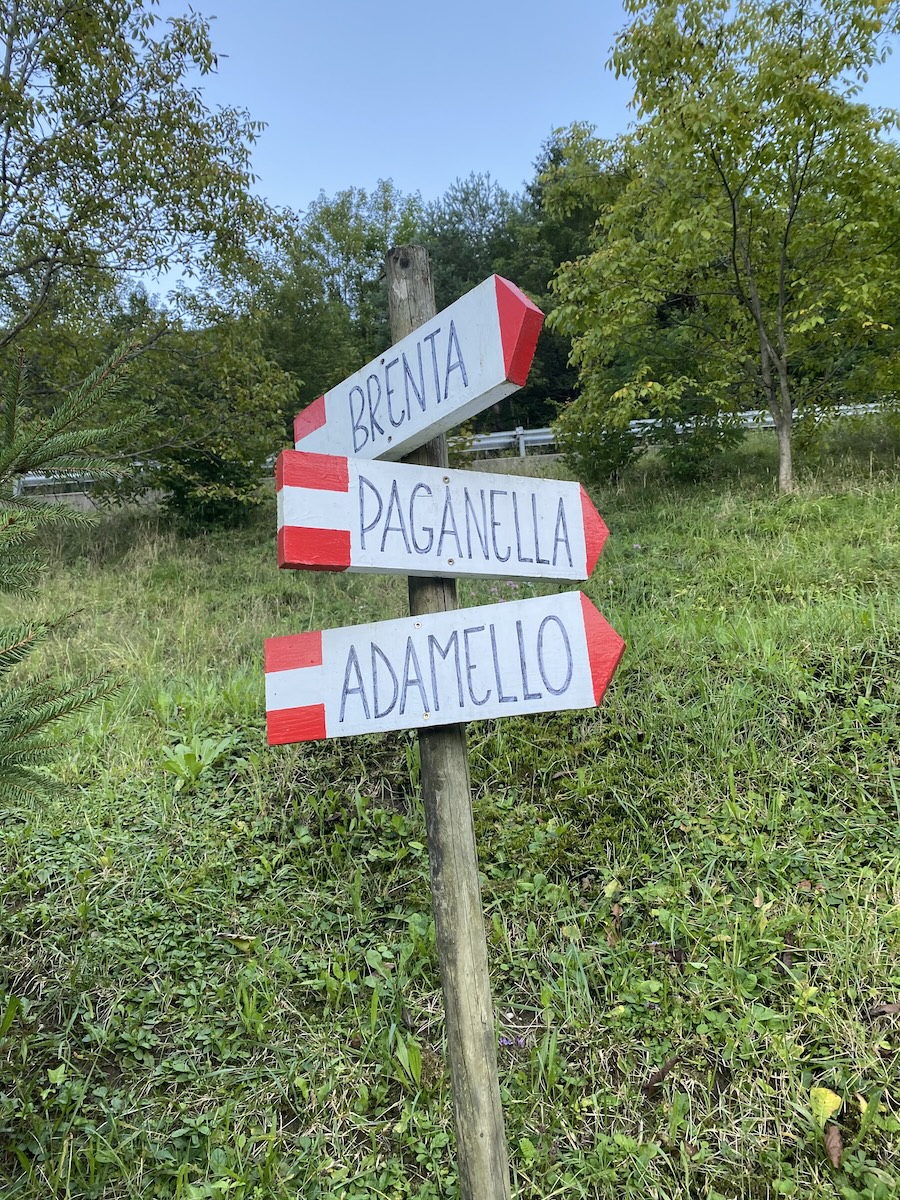
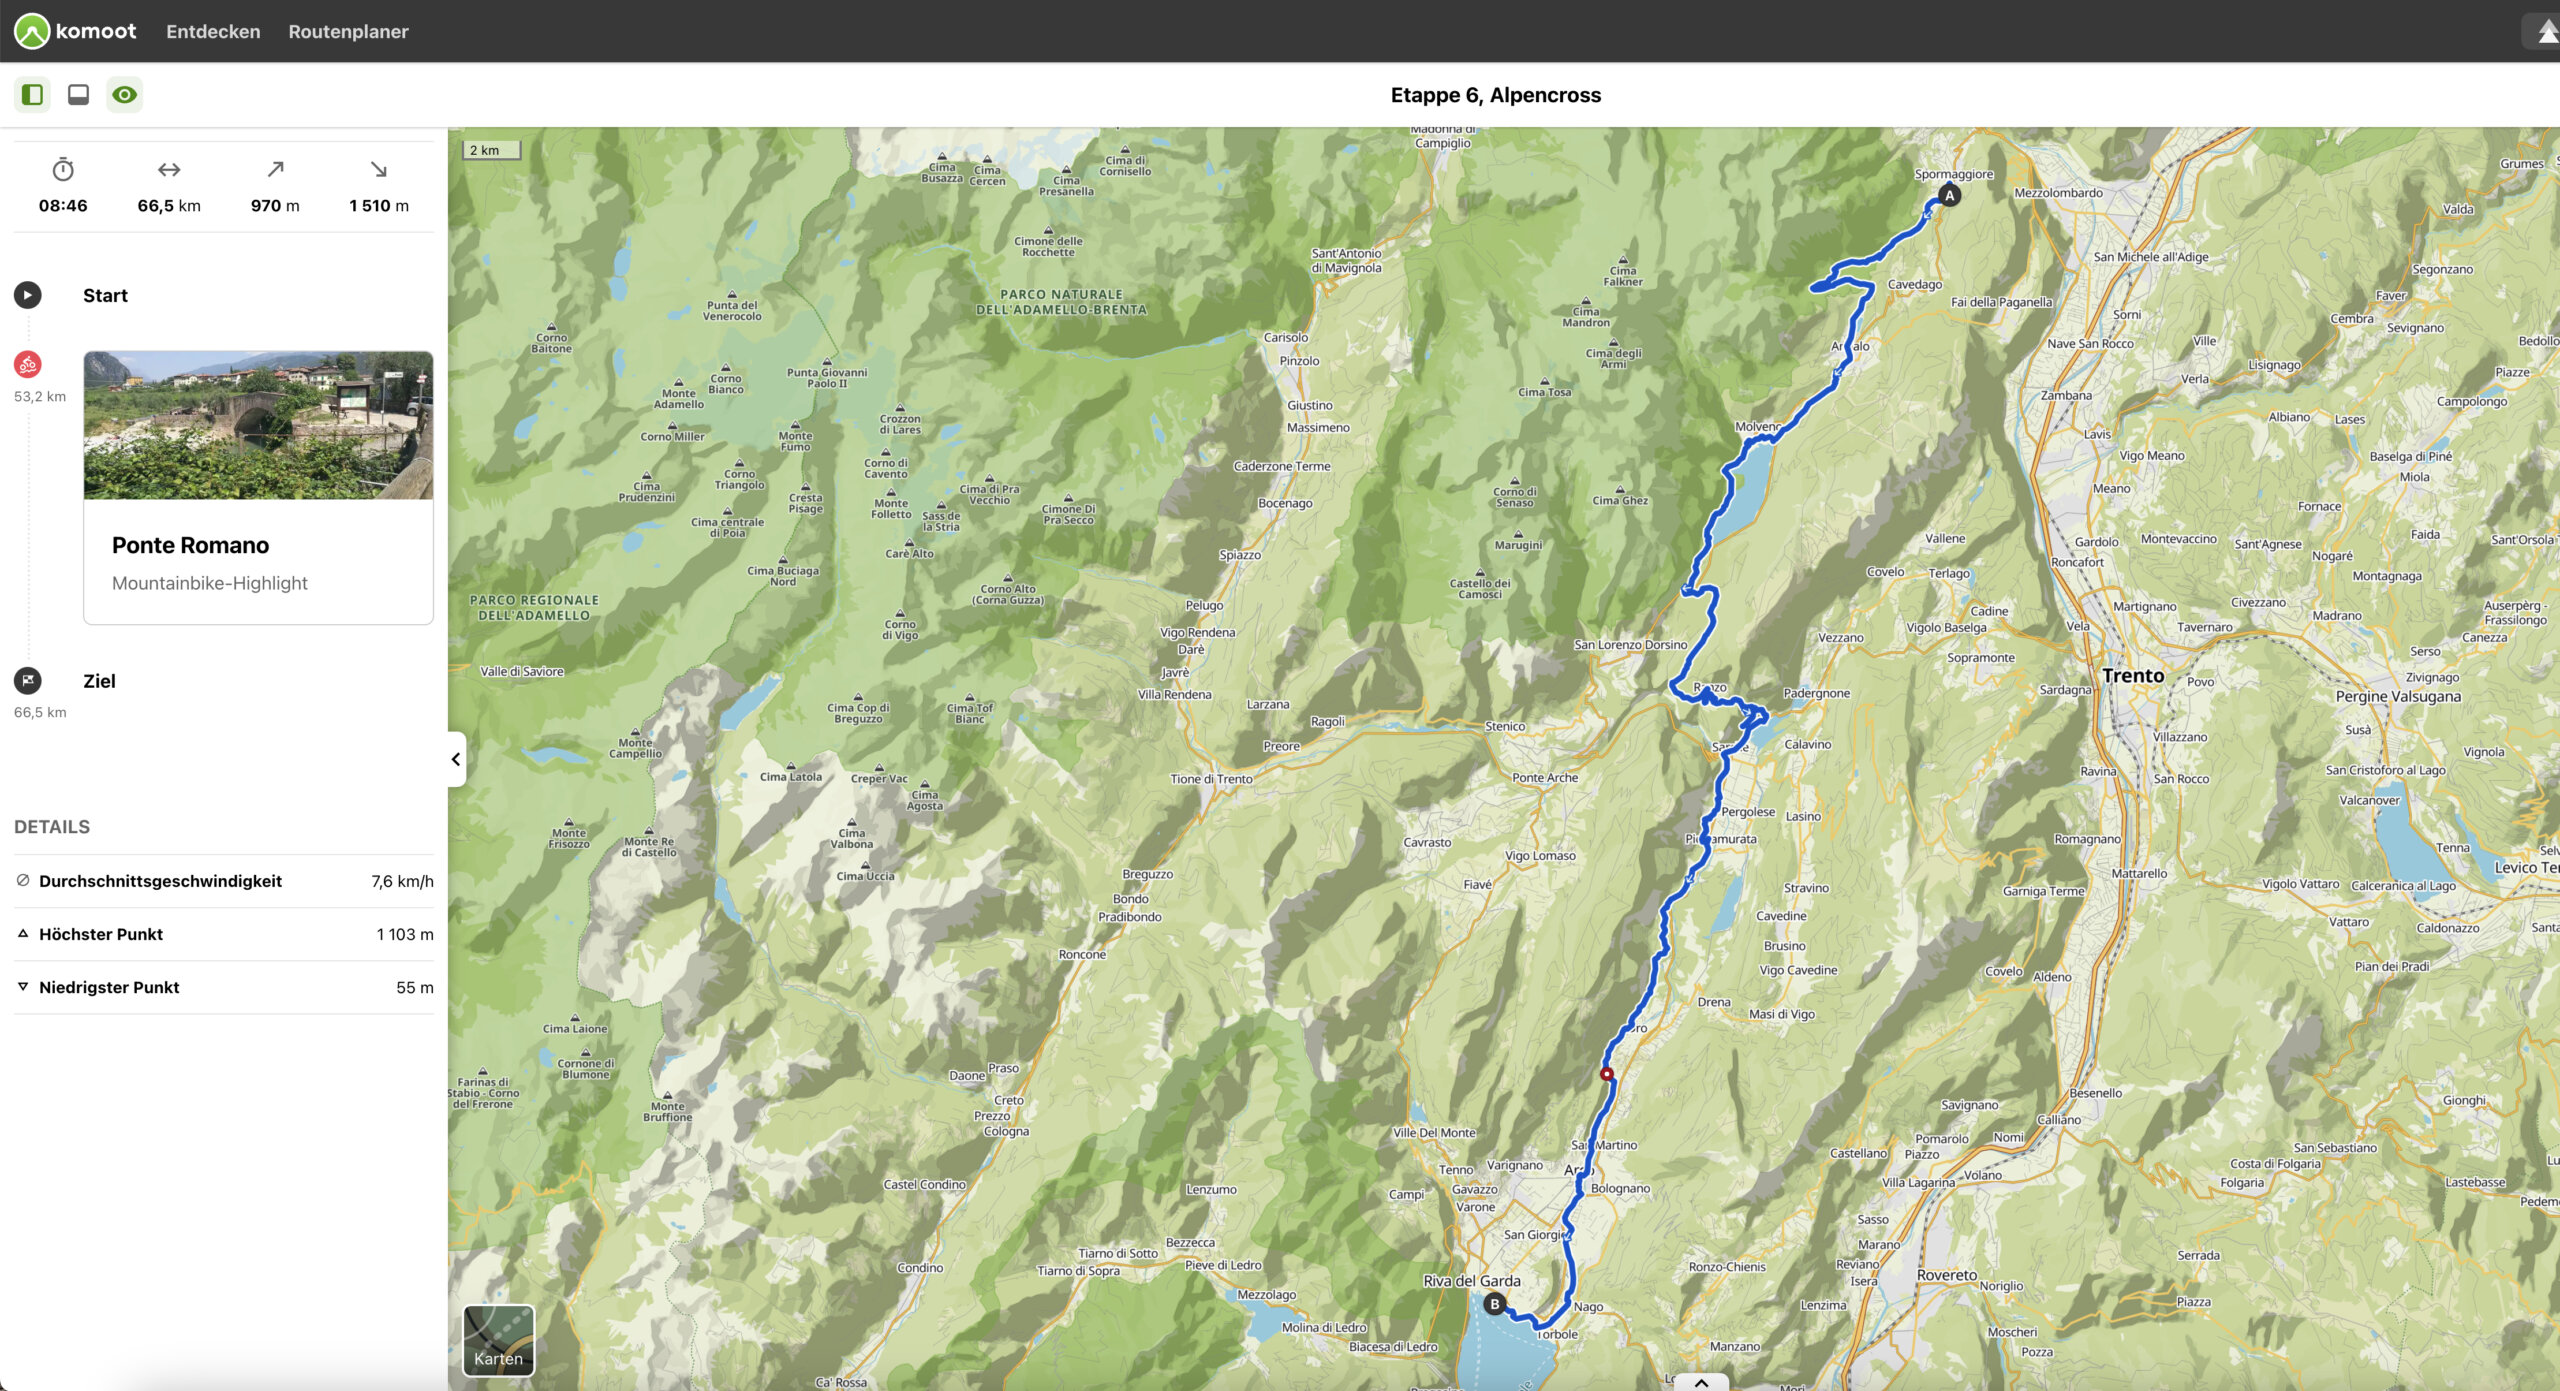
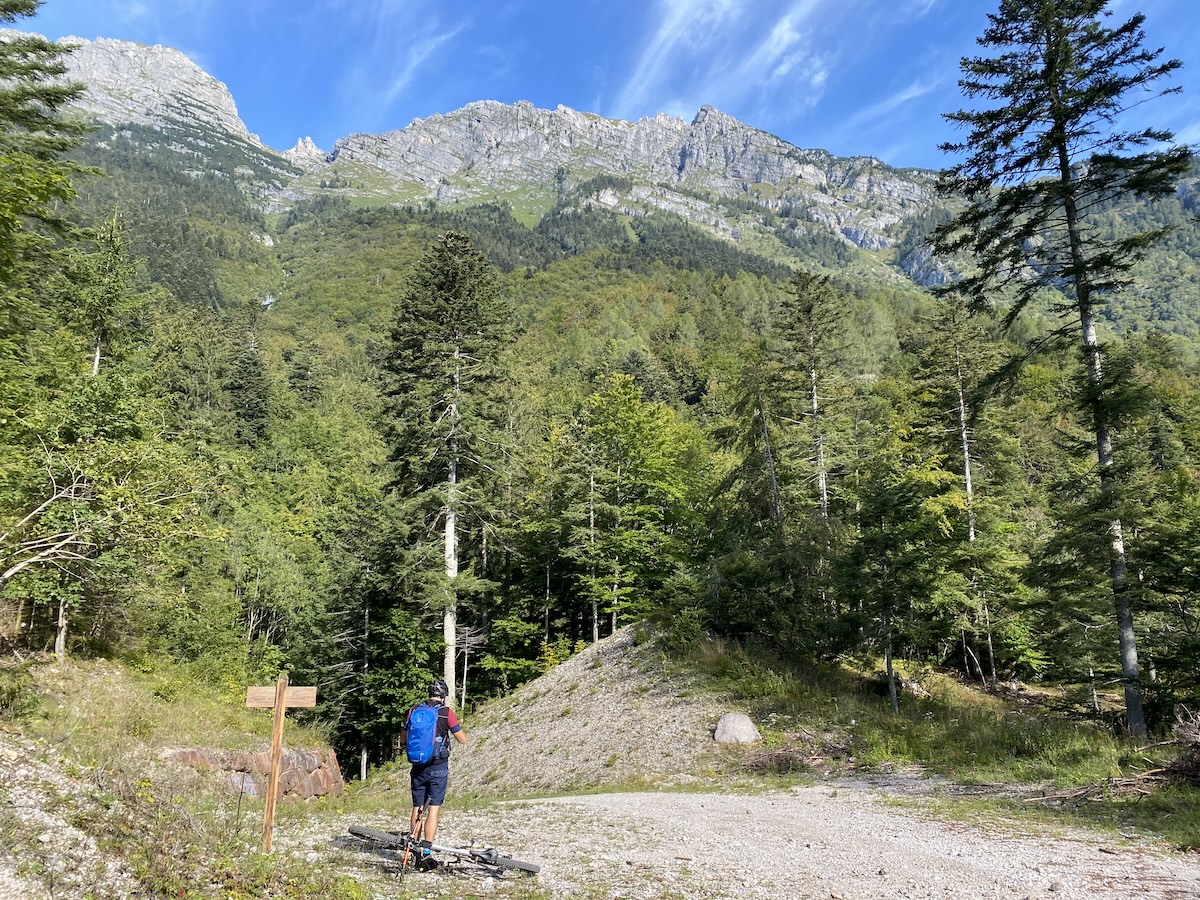
Stage 6: Spormaggiore - Lake Molveno - Riva del Garda | 66.5 km, 970 m elevation gain
The sixth and final stage took us from Spormaggiore to Riva del Garda on Lake Garda. The first part of the route took us through a beautiful wooded area, first to Andalo and then on to Molveno.
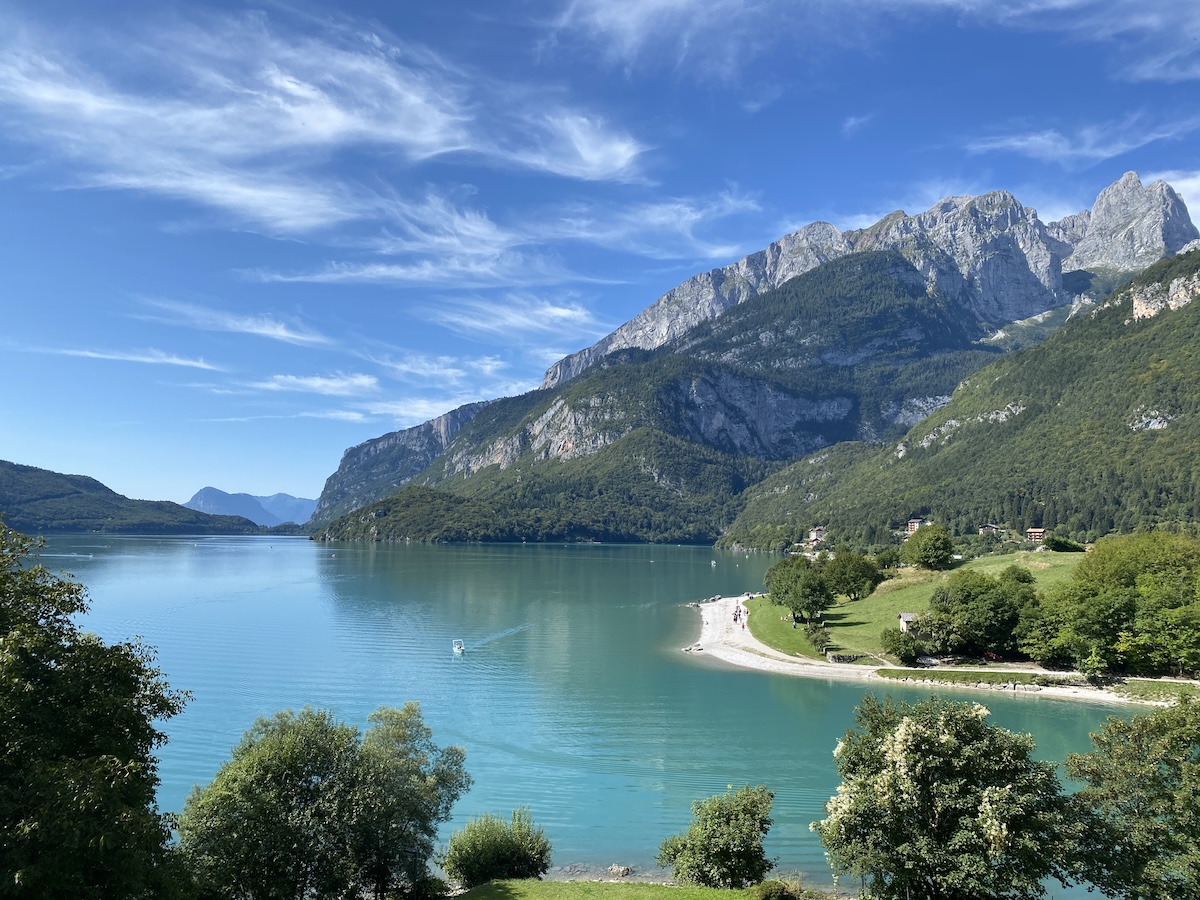
Once we arrived at Lake Molveno, we stocked up on provisions and enjoyed lunch on the lake shore. As the weather was finally right for the season, we were able to enjoy the sunshine by the lake to the full.
The rest of the route took us via the village of Ranzo to Lago di Toblino. Unfortunately, Komoot once again threw a spanner in the works. A trail designated as an MTB route turned out to be a via ferrata! Without equipment and with the bike on your shoulders, it makes little sense 😉
Luckily, we found an alternative route that took us to Lago di Toblino on the road.
The rest of the route was then quite relaxed along the Sarca with a short stopover in Arco before we finally reached our destination.
Alpencross Garmisch-Lake Garda: Arrival in Riva del Garda
After six stages and 355 kilometers on the mountain bike, the arrival in Riva del Garda is an unforgettable experience. We were overjoyed to have reached our goal. After all, we have invested a lot in planning, organization and training.
After arriving, we first had a wheat beer. We treated ourselves to a cab with bike transfer for the last few kilometers to the apartment, as we no longer wanted to ride the Gardesana by MTB.
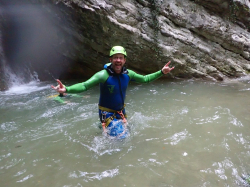
The next day, before returning to the parking lot, we did a via ferrata with Christian. We simply wanted to give him this experience too. We celebrated the successful conclusion in our regular restaurant La Fenice in Vesio.
The arrival in Riva del Garda was a wonderful end to an unforgettable tour that sometimes pushed us to our limits, but also rewarded us with unforgettable impressions and experiences.

Alpencross Garmisch - Lake Garda: My conclusion
The mountain bike tour from Garmisch to Lake Garda was a challenging and unforgettable adventure.
Despite careful preparation with intensive training and precise planning of the route and equipment, the tour presented us with a number of challenges. These ranged from technical difficulties to unexpected weather conditions.
The stages were varied and led through impressive landscapes, with each stage offering its own highlights and challenges. Despite the occasional hardships and obstacles, the arrival in Riva del Garda was a triumph that rewarded the efforts and left behind deep satisfaction and pride.
This tour was not only a physical and technical challenge, but also an impressive experience that showcased the beauty and diversity of the Alpine landscape in an impressive way and created unforgettable memories.
FAQ about the MTB Alpencross Garmisch - Lake Garda
How long did the entire mountain bike tour from Garmisch to Lake Garda take?
The tour was divided into six stages and lasted six days. Each stage offered different challenges and landscapes. The total distance was 355 km, the difference in altitude was 5980 meters.
What preparations were necessary for the MTB tour?
The preparations included planning the route, training (started in spring), checking the technical equipment of the mountain bikes, organizing transport and equipment as well as planning food and accommodation.
What kind of equipment was used for the tour?
The equipment included full-suspension mountain bikes without electric drive, suitable backpacks, adapted cycling clothing, helmets, cycling shoes, gloves, glasses, water bottles and various tools and spare parts.
Is the tour suitable for beginners?
A large part of the route was also suitable for beginners. In terms of fitness, the tour was also perfectly feasible for less experienced and trained riders. In some places, the route was challenging and a little more difficult to ride.
Can the tour also be ridden on an E-MTB?
With a few exceptions, the route was fully passable. Alternative routes can be planned for the sections with pushing/carrying passages if necessary. However, unforeseen events that make it necessary to carry the bike can never be completely ruled out in the Alps.